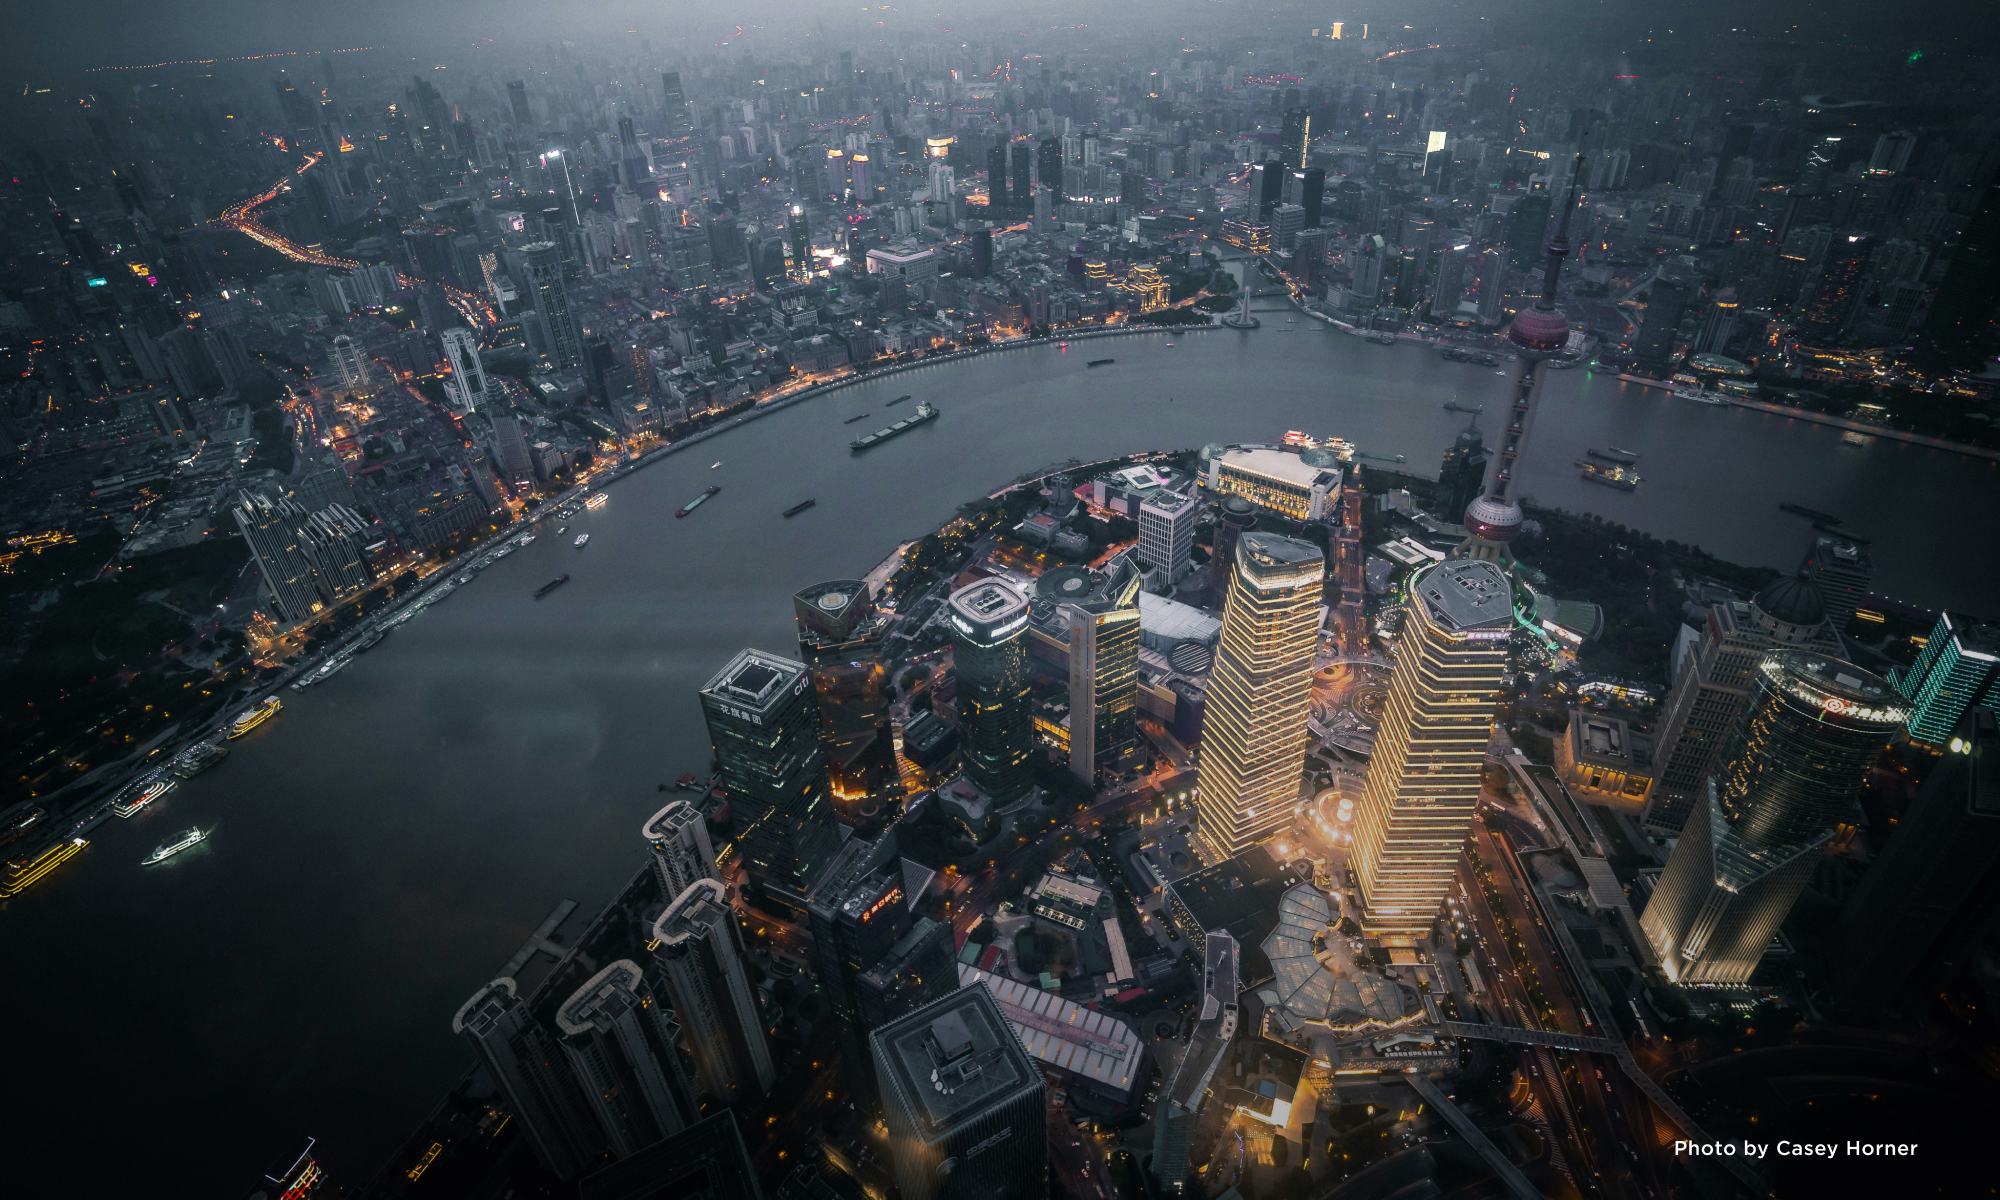
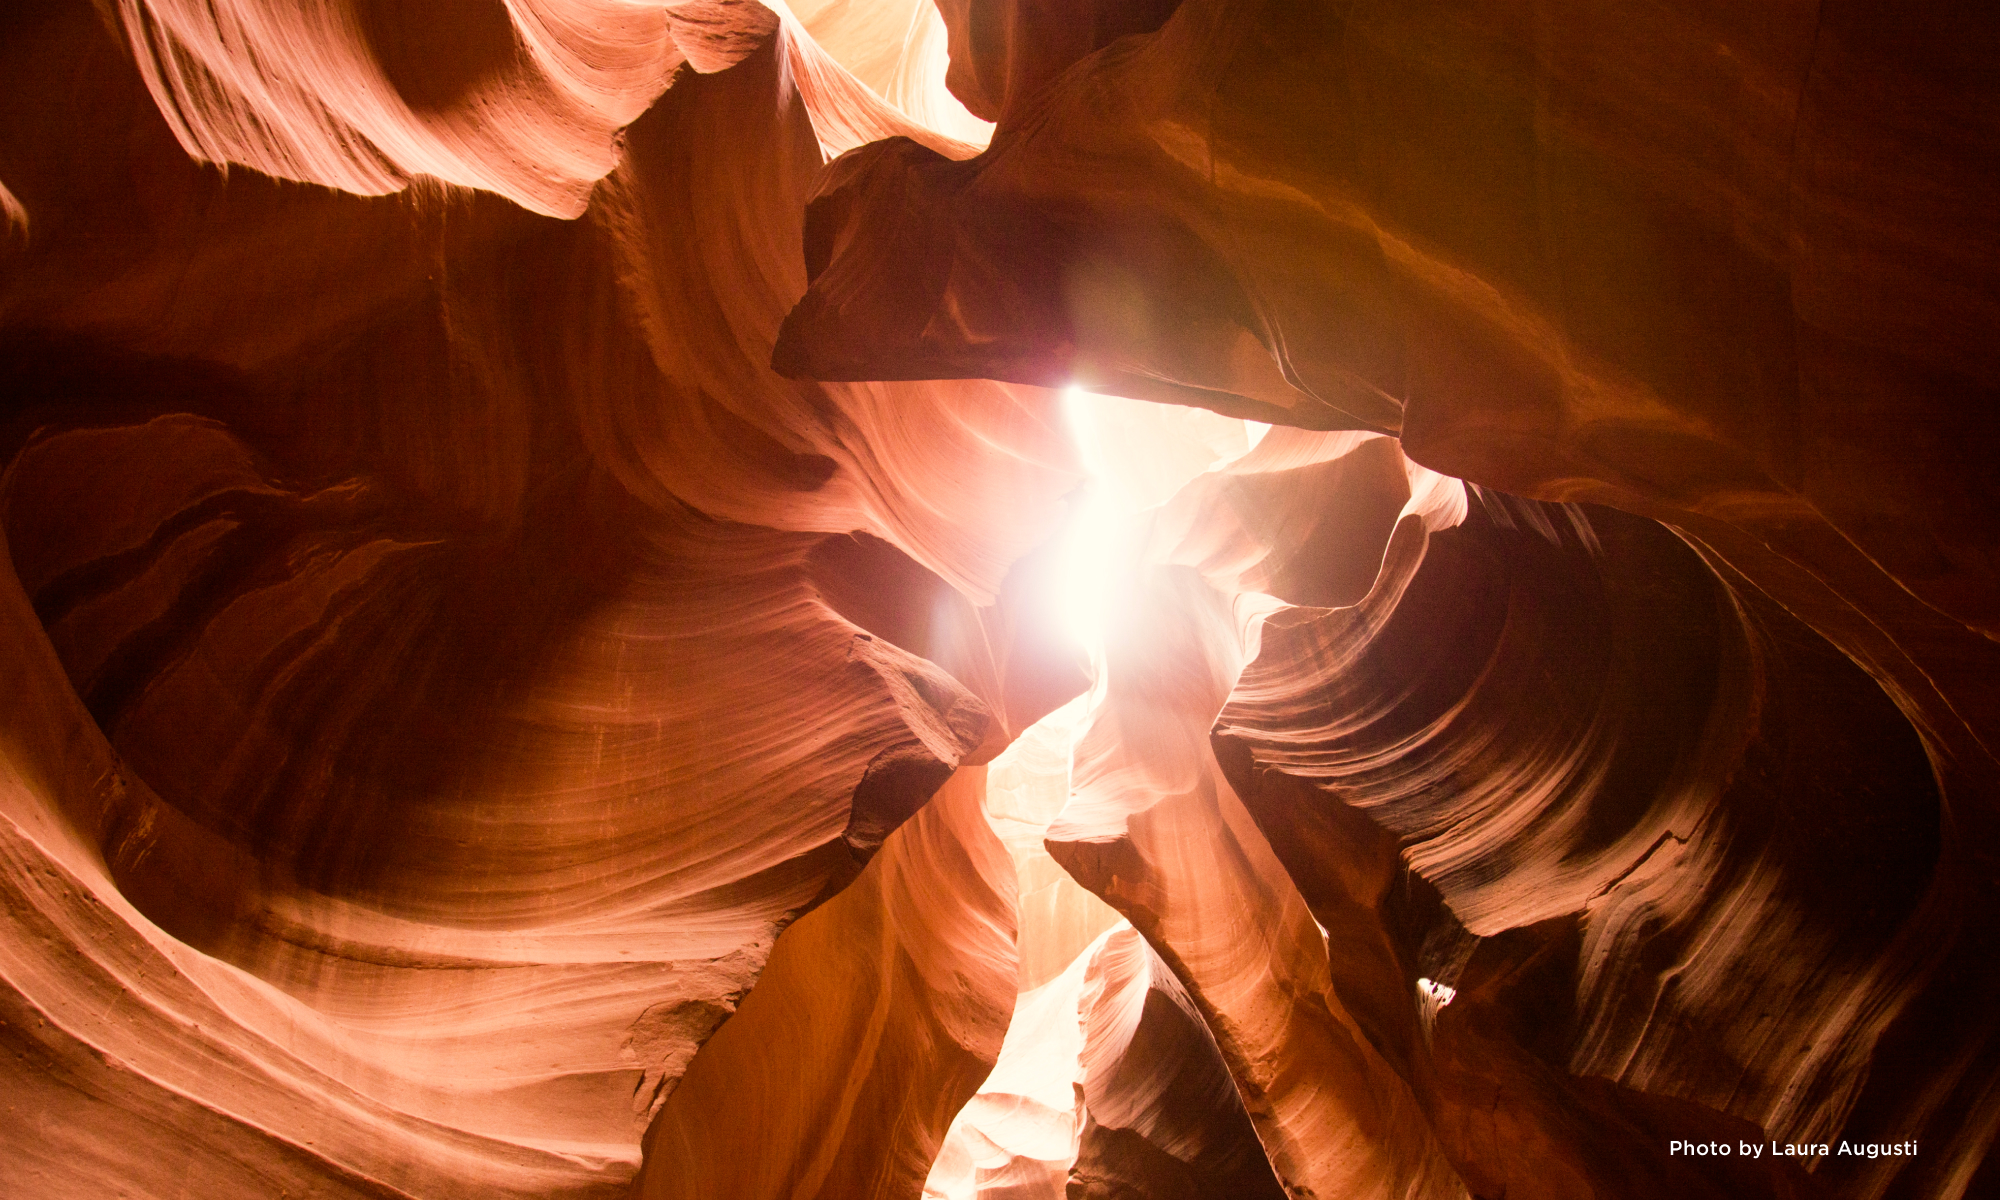
Organization

SmugMug Spotlight: Richard Burley.
SmugMug Spotlight: Richard Burley.
Richard Burley is an educator, photographer, and the founder of Epic Action Imagery. He travels the world photographing sporting events from football and hockey to obstacle races like Tough Mudder and Spartan. We caught a moment of his time to talk about luck, sofas, and velociraptors, among other fun details.

SmugMug: Hi Richard. To start with, tell us about yourself!
Richard Burley: I’m a sports and action photographer based in the UK. Prior to taking up photography as my full-time job, I worked in education. Initially as a college teacher progressing up the career ladder to management roles. In 2014, just as my photo business was starting to grow, a conversation about volunteers for redundancy saw my hand shoot up. A few weeks later I packed up my desk and headed out of my office and on to what became a huge adventure. I do still teach a few hours and enjoy that side of my life too, but I fell in love with action photography early.
SM: How’d you get into photography?
RB: I’ve had an interest in photography since I was a child watching my dad in his home darkroom developing photos. It wasn’t until much later that I started to think more seriously about taking photos professionally, but my interest in capturing sport, action, and movement was growing.
I bought my first DSLR with the royalties from a text book I co-authored and started to learn lessons by trial and error. I prefer to learn by experimenting and finding out what works and what doesn’t rather than reading or watching others. The only qualification I’ve actually got is a badge from Cub Scouts. I’m very much self-taught.

SM: Tell us about starting and growing a photography company?
RB: The real start of it was in January of 2010. I’d stopped coaching football and decided I wanted to get into photography, and was shooting semi-pro matches for a friend. But I just wasn’t getting the shots I wanted, because I was convinced I didn’t have the right lens.
So I go to the camera shop, just to look at a new 70–200mm lens…and 30 seconds later I’m walking out with the box. [laughs] And I’m thinking “I’ve just spent the sofa deposit on a new camera lens, this is gonna take some explaining.”
So I told my wife I spent the money we’d saved for a sofa on a camera lens, and she responded “Well you’re gonna have to take that lens and make that money again.” Which I took very literally! I said okay, I’ll start a business.
SM: The right equipment can make all the difference! What happened next?
RB: A couple of months later, I’m shooting the occasional sporting event, making a little bit of money, but still employed full-time with the college, when on a trip to Cambridge with the family I spot a billboard. On this billboard is a picture of someone jumping over burning straw bales, and I thought “that looks like fun, why don’t I see if they’ve got a photographer?”
There’s a concept people in business will often refer to called “luck.” I think I’ve benefited from an enormous amount of luck. This was a billboard for Spartan Race. They’d just started — one event in the US, no events anywhere else, this was their first event in the UK — and they said “you know, we hadn’t thought about course photography, of course you can come!”
That first moment at a Spartan Race really told me what it was gonna be like: I’m set up along the course, waiting for people to come from the right, and suddenly they appear to my left like velociraptors. And that was it. That said to me “don’t ever expect everything. You know that thing where you like things to be predictable? You’re gonna have to part with that.”

SM: What a lesson to learn on the first day. How’d you grow that into the Epic Action Imagery we see today?
RB: Well, one thing led to another and soon Spartan was asking me to shoot their international events. Then other events start asking me to shoot, because they’re pulling from Spartan’s pool of course photographers, and suddenly I’m doing this full time and building teams. I’d call it an accidental business, really. An experiment that got entirely out of hand.
I think I was fairly lucky, again, because I was an educator and a manager in my full-time work before this. I was used to recruitment, I was used to building teams, passing on information, delegating, and allowing people to grow. Everything I did was very developmental.
The whole purpose of education is to help people grow to become better than yourself — and not be intimidated by that, which is a great fit for photography. It’s really something I look for while building a team of photographers: work that makes me stop and go “whoa. I’ve gotta know how you got that.” I’ve had the privilege of working with other photographers that inspire and enthuse me to work hard and to keep learning.

SM: What is it about action photography that calls to you?
RB: I enjoy the challenge of capturing movement at the right time. Facial expressions in sport really tell a story too. Emotions are often amplified in a sporting environment and seeking to tell the story is a challenge that I enjoy. Participants on a Tough Mudder course emerging from ice filled pools or getting zapped by electricity really brings out a range of expressions. And I’ve done a couple of the events myself so I have an inkling of what they’re experiencing.
I enjoy the people too. Sports events have an energy and a vibe that I find motivating. Capturing people overcoming fears or beating their personal bests is a responsibility I take seriously and I work hard to ensure that moment is captured for them to share with their friends and family. There’s been several moments where I’ve captured people who’ve overcome significant changes in their life to achieve a sporting goal. Often I find there’s a bit of dust in my eye when seeing such a victory.
A big motivation for me to make amateur sports people look like pros, giving them an image in which they look truly epic. From my personal perspective I always try to take a picture that makes a person look and feel like Usain Bolt. When they’ve had a bad day and they’re reaching for that beer in the fridge, they can see a picture on the fridge door of themselves leaping over flaming hay bales and think “I am awesome! I am epic!”
SM: Last business question: what’s the biggest challenge in shooting action photography?
RB: The vagaries of the weather, absolutely. I’ve worked in 42 degree heat (108° F) in Bahrain, and I’ve worked in -20 cold (-4° F) in Canada. Thigh-deep snow, I’ve been swatting flies off, days where it feels like someone’s hitting me with a firehose, but I love that. I love being outdoors. To reframe that: I don’t think there’s a challenge apart from loving what you do, really.
Even when you’re shooting the same thing — someone jumping over flames or crawling through mud — how do you tap into the journey they took to get there, to be fit enough to run five miles and leap over these flames? The biggest challenge, and the biggest joy, really, is tapping into the energy and euphoria of these participants each and every time.

SM: What gear do you use to capture those moments?
RB: Canon 1DXs (3 x mk1 and 1 x mk2) with a range of lenses from 16mm to 400mm. I started with Canon in 2006 and have yet to be tempted to try anything else. I am curious to try a few mirrorless options and listen to the experiences of other photographers when considering my kit choices, but the 1DX is a versatile workhorse and has coped very well with the range of conditions that I find myself working in and the image quality means that I can get the images I want.
The lenses I favor for events are the 16–35mm and the 70–200mm. My kit gets a fair amount of scuffing on rocks and hard ground so I use an EasyCover to try to keep my kit protected.
For football, I’ll have the 400mm and 70–200mm as a main set up and the 16mm on a remote camera positioned behind the goal using a PocketWizard set up. The 400mm is my favourite lens. It’s an old-school mark 1 IS 2.8, but so crisp and ideal for capturing the action that unfolds at the other end of the pitch. It’s a little heavy and if the teams change ends before kick off, it’s quite a challenge to run round the pitch perimeter with all the gear. I hear the mkIII may be a little more mobile and I may make the switch in the future.
SM: Speaking of gear, what got you started with SmugMug?
RB: I started with SmugMug in 2013. I met a representative at the PhotoShow and at the time was looking for a platform to host event images in a cost-effective, reliable, high quality, and simple to use manner. I was also in search of something that would let me search my photos by keywords and bib numbers so I could easily sort participant photos. We had to be able to deal with the kind of peak demand that these events generate. Fortunately, SmugMug met all these criteria and I signed up that evening. 4.7 million photos later we’re still going — if I posted one photo every minute, it would take me 7 ½ years to get through them all. We love it.

SM: What’s your most-used or favorite SmugMug feature?
RB: I actually just redesigned the site last week. Part of our post-COVID recovery has been taking the time to think about what we do and why we do it, and engaging with my local business community. I met with a local marketer who told me “your photos are amazing, but man your website’s old fashioned.”
So I tried a landing page, liked the look, and three hours later I’ve got the whole site looking brand new. It was that easy.
In terms of what I use a lot, it’s image library management. SmugMug works as part of our client relationships, so Spartan or whoever can go in and retrieve images easily, and we manage their photo library as part of the business relationship. They tell us what details they want for the photo — keywords, metadata, factoids, you name it — and we’ll get those set up for them.
Photo sharing is a big part of it, too, and obviously sales, which we like because they’re all seamless. It’s also visibility. I can see what photos people are buying, track stats, keep up with what’s popular. Sometimes you get excited about an image as a photographer because all of the elements came together, and you get to see people excited about those same things enough to buy and share them, too.
SM: Lastly, any tips for a new SmugMug user?
RB: Learn. Keep learning. See what others do, interrogate the style, and let that style influence you as you capture your images and organize your site. There’s so many wonderfully talented photographers showcasing their work on SmugMug, it’s a great way to find inspiration and to showcase your own work.

_______
Follow Richard Burley on Instagram and Facebook. Also, visit his website at https://www.epicactionimagery.com.
And, tell us what you think of this interview! Start a conversation on SmugMug’s Twitter, Instagram, and Facebook.

Get to know SmugMug’s powerful assistant feature.
Get to know SmugMug’s powerful assistant feature.
The SmugMug Pro plan offers an "Assistant" feature which can be a game-changer for busy photographers. Let’s learn more about this feature and the value it provides.
Maximize efficiency and productivity.
By using the "Assistant" feature, you can delegate time-consuming tasks like uploading and organizing photos to your trusted associates. This means less time spent on administrative duties and more time focused on what you do best—capturing stunning images.
Collaborate your workflow.
Utilizing an “Assistant” password enables you to work seamlessly with your assistants, ensuring a smooth workflow and organized photo management. This can lead to enhanced productivity and better outcomes for their photography projects.
Delegate without compromising control.
Delegating tasks to your assistant does not mean relinquishing control or sharing sensitive account information. You define a separate password for your assistant to use. When logged in, assistants will only have access to important workflow features (like uploading, organizing, keywording, etc). They will not be able to take any destructive actions like deleting content or changing prices on your photos.
Foster business growth.
The "Assistant" feature can directly contribute to the growth of your photography business. By delegating tasks, you can take on more clients and projects, expand your portfolio, and increase your overall business capacity.
Establish work–life balance.
Utilizing an assistant gives you the potential for a better work–life balance. With the help of an assistant, you can free up more of your personal time, reducing burnout and stress.
Utilize specialized skills.
Assistants often have specific strengths. For example, if an assistant has expertise in photo editing or culling, they can handle those aspects while you focus on shooting.
Discover hidden opportunities.
By streamlining your workflow with an assistant, you might discover hidden opportunities for innovation and growth within your business. Freed from routine tasks, you can explore new creative avenues or expand into areas you previously didn't have time for.
With an easy learning curve.
The "Assistant" feature is designed to be user-friendly and intuitive. Your assistants have access to the key parts of your same SmugMug account and can quickly learn how to navigate the system and contribute effectively to your workflow.
The "Assistant" feature on SmugMug isn't just a time-saver; it's a strategic tool that empowers you to leverage your strengths, grow your businesses, and achieve a healthier work-life balance. By utilizing this feature, you can shift your focus from administrative tasks to your true passion – capturing breathtaking moments through your lens. Learn more about this feature today!
Available only for SmugMug Pro subscribers. Not on the Pro plan? Learn more about how the Pro plan can help you elevate your photography business.
SmugMug’s Events feature makes photo delivery smooth for everyone.
SmugMug’s Events feature makes photo delivery smooth for everyone.
The SmugMug Events feature gives your clients a way to pick their favorite photos from galleries you've curated for them, streamlining the purchasing or photo delivery process in a simple and elegant way. Set up is easy and the benefits are many:
You provide easy access to a group of galleries via a single click.
You even get to customize the URL. Your client sees a gorgeous, personalized presentation with each gallery displayed before them, highlighted by an optional slideshow.
Your important clients can pick favorites.
Just add them as participants. Click the Share button and send them a personalized email invitation with their unique link to the event.
You can control access by making your events public, unlisted, or protected with a password.
If your event is public, you can set up the option for viewers to register themselves, meaning you get to collect their email addresses and they get to pick favorites. Win–win.
How it works.
Registered participants (your clients) browse the event galleries and choose their favorites, marking them with a little red heart. As favorites are clicked, virtual copies of each favorite photo are placed in a special Favorites gallery. Favorites galleries are unique to each registered guest or participant and visible only to them (and you). And your visitors will always know where to find their favorites gallery because we'll send them an email that includes a link to it.
In short: It's easy for your clients to pick, choose, and view their favorites.
They can review them, whittle down their selections, or add new favorites at any time. Participants can purchase any of your available products directly from within their favorites gallery, or anywhere within the event. If you’re working with a client on selections for a special project, like a wedding album, their choices are only a click away. No more trying to hunt down cryptic file names from an email.
Tips to maximize your events.
Feature the event on your homepage. SmugMug allows you to set up your event and generate a URL beforehand so you have that info at the ready. Online, you can modify your event and add new photos as they become available. If that’s too complicated, you can even feature an event on your homepage, putting it front and center.
Feature the event gallery (or galleries) on printed materials at the event. Include the event URL at every opportunity, like the following. (Make sure your printed material matches the formality of the event.)
- In the event’s program.
- On business cards you make just for the event.
- On postcards included in swag bags given out at the event.
- On elegant formal event cards displayed on tables, at the guest book, or at the registration table.
Talk to your host. If your event has a chairperson, director, or simply a social butterfly, exchange email addresses and information. Chances are they have access to a mailing list, registry, or directory in which to distribute info about the event, the photos, and you.
Remember, the people you photograph want to see their images. It’s up to you to get them to where the photos live. Events are one way to make that process a little bit easier on you and your clients.
Kickstart your Lightroom workflow.
Kickstart your Lightroom workflow.
Attention, Lightroom lovers! Today we have a post by our friend, Matt Kloskowski, founder and CEO at Matt Kloskowski Photography and Education, former education director for Kelby Media Group, and a Tampa-based photographer. Kloskowski is the author of several best-selling Photoshop books and teaches Photoshop, Lightroom, and photography seminars around the world. He hand-picked a few favorite ways for Lightroom users like you to get your photos finished faster. He's currently promoting a new "Goodbye, Lightroom" course to help users transition from Lightroom Classic (the desktop-only version) to Lightroom (the cloud version).
We've all heard the phrase "time is money." Well, if you're shooting weddings or events, you need to get through your photos and get them organized quickly and efficiently. Then you can get on to the good stuff: editing and getting out there to shoot more photos. So to help out, I've compiled my favorite tips to kickstart your workflow and keep you moving through Lightroom as quickly as possible.
Tip #1. Use flags instead of stars.
A big part of speeding up your workflow is identifying your favorite photos. If you look under the Photo menu, you'll see Lightroom has two ways of picking your favorites: Set Flag and Set Rating.
Ratings are difficult to work with. Most people are familiar with the 1- to 5-star rating system, but the main drawback is it has too many choices. Five stars is a keeper, right? Four stars probably means the photo is pretty good. Three means it's decent. Two would be bad. And one star would be a reject that you throw away. But what happens if you go through your photos and come across something that isn't a throwaway or isn't an absolute keeper? You sit there and debate whether it's a two-, three-, or four-star photo. Either way, it's not your favorite, so you'll probably never do anything with it. Yet you're giving it too much time in the rating process. And, inevitably, when something takes too long, we stop doing it.
Instead of using ratings, try using the flagging system. This way, you get two choices:
- Flagged means you like it.
- Reject means you don't, and you want to delete it.
Go through your photos quickly and hit "Z" to flag or "X" to reject. If you don't flag it or reject it, then it stays unflagged, which is that grey area you're just not sure about. But you don't have to press a key to be indecisive—Lightroom just assumes you're indecisive about the photo by leaving it unflagged. So your job becomes really easy! Flag it if you like it and think there's a remote chance you'll do something with it again one day. Reject it if you don't. Then hit the right-arrow key and move on.
Tip #2. Delete the bad stuff (and an easy way to do it).
Another way to speed things up is to keep your library as clean as possible and get rid of the stuff you’ll never use. If you followed the previous step and are using the flag system, you should have some rejects that were marked with an X. A simple way to delete them is to select the filter icon near the search bar at the top of the window and then select the rejected-photos flag. Select all the photos in the filmstrip at the bottom and right-click > delete. Lightroom will delete all the rejects at once so you don't have to go back and get rid of them later.
Tip #3. Use albums.
Using Albums in Lightroom is more important than ever and probably one of the fastest and best ways for you to speed up your workflow. Photos that go into an album are photos that should be one click away and the photos you'll want to see most often.
Let's say you have 2,000 images from a wedding. You want to quickly show them to the bride/groom or family. Do you go through and show them all 2,000 photos? No way! Instead, you create an album. It's a way for you to get to your favorite photos in just one click.
Typically, I'll look at my photos and go through them one by one. I'll hit the letter Z to flag photos as a favorite when I come across them. Then I can quickly sort to see only my picks by clicking the flagged icon in the Filter strip.
Once I've figured out what my favorites are, I select them all (Edit > Select All), go to the Album panel, and create a new album with a descriptive name (usually the last name of the bride/groom).
Tip #4. Use folders.
Albums have an extra level of organization called Folders that are key for events like weddings. Think of a folder set as a group of nested albums. If you put your picks from a wedding/event into an album, you'd have all the best photos from all parts of the wedding in one place (the album you created). The problem is that this album could be huge. This is where folders come in.
You'd create a folder (for example, a top-level folder with the bride/groom name) and then create albums within the folder for each part of the wedding (formals, church, reception, etc.). Here's what a folder could look like in Lightroom:
Bonus tip: Get them uploaded safely.
Once your photos are all cleaned up and ready to go, you're just a few clicks away from uploading them safely into your SmugMug website. The publish plug-in is free, gets your photos seamlessly into SmugMug, and also lets you sync, make galleries, and keep your online presence as clean and organized as your Lightroom library. You can also see and adjust your customer's event favorites, republish, and even proof your orders all right within the SmugMug Publish module. Get it now.
_______
What Lightroom tricks have cut time off your photo-editing workflow? We'd love to know!

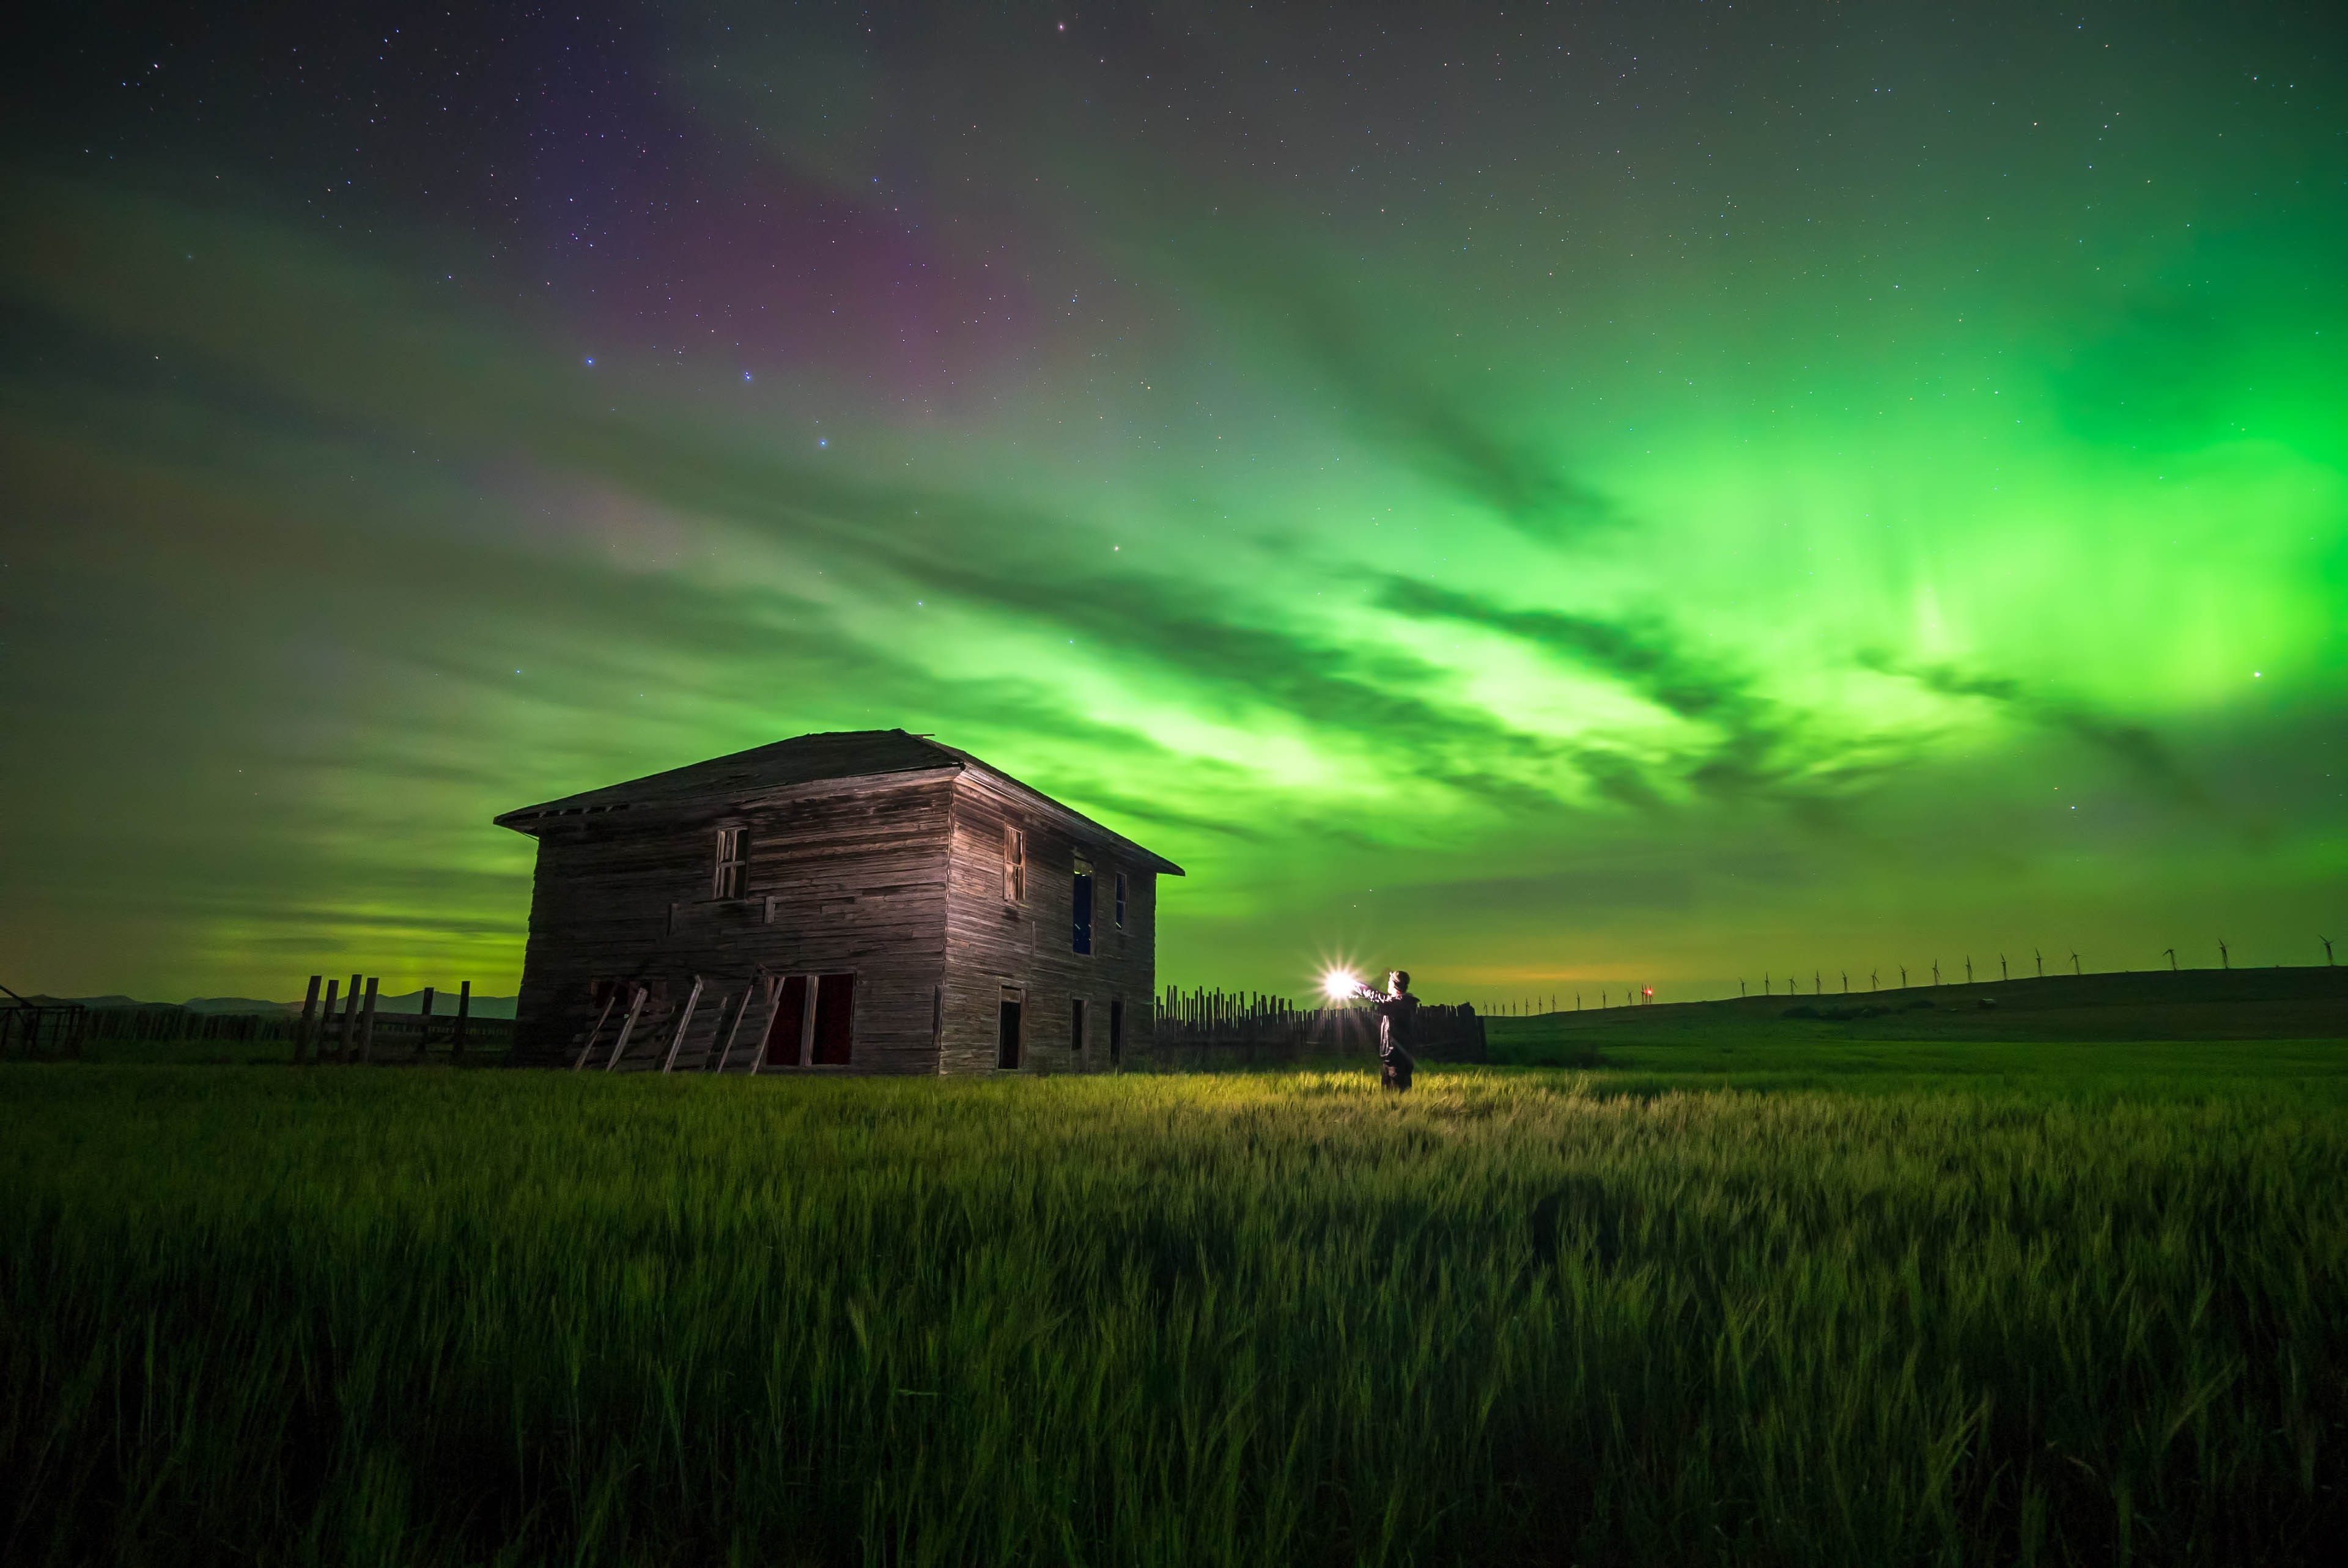
SmugMug Films Interview: 10 tips for elevating your outdoor photography with Andy Best.
SmugMug Films Interview: 10 tips for elevating your outdoor photography with Andy Best.
Andy Best grew up with art in his blood; his grandmother was a successful oil painter, and he followed in her creative footsteps, sketching and drawing. His love for sharing emotion through visual mediums expanded into filmmaking and eventually photography, both of which led him to his outdoor adventure lifestyle. We caught up with Andy and his family on the road to learn more about what inspires him and how he decides where his next adventure lies.
Tip #1: Look for the ah-ha moments.
I grew up playing outdoors all the time, and I kept finding moments that would stop me in my tracks. I always found that a pretty compelling reason to stop and take a photo. But then there’s the challenge of using your tools the best you can to share a 2D image of what you’re seeing that can evoke the same emotion that made you stop. If you’re able to keep your radar up and witness those moments, really feel them, then capture them in stills or in motion, you’re kind of a wizard in a way — a magician.

Tip #2: Take time to enjoy the moment.
The greatest picture I didn’t take is always the one when I first get to a location. Instead of jumping right in to getting my gear ready, I tell myself I’ll ease into it the next day. For the initial day or evening, the “image” is only for my own eyes. I take a moment to enjoy the setting for myself without worrying about capturing it for anybody else. You know the film, The Secret Life of Walter Mitty, when Sean Penn is sitting up on the cliff edge getting a photo of a snow leopard? Ben Stiller asks him why he didn’t take the shot he was waiting for, and Penn basically says, “This one’s for me.” Those are probably the images that mean the most to me.
I have a friend I reached out to once for advice and he said, “I don’t really know if I can give you any advice but this: Just remember to put your camera down from time to time, and enjoy where you are.” I’ve taken that with me everywhere.

Tip #3: Do what you love and the rest will follow.
My career in adventure-lifestyle photography was a complete accident. I love filmmaking, and I love telling a visual story through images. I’ve also always felt very protective of landscapes. It wasn’t until a commercial-video client saw my side work that they approached me and asked me to do some fly-fishing photography work. I tried explaining that that wasn’t what I did, and I didn’t even own a good still camera. But he challenged me. Told me to try it. Next thing you know, I was shooting all these brochures. Then, more people started calling me a photographer because I was building a stills portfolio simply to start conversations with brands like Patagonia. I really wanted to wow them, start a conversation with photos, and then mention, “Hey, I do video work as my specialty. I’d love to do any video work you might have.” But next thing you know, everyone wanted my photo work.

Tip #4: Get out of your comfort zone.
We live on the road in our camper van nearly 100% of the time, and I really like the discovery aspect of going to a new place: it’s fresh, and you see things in a new way. When you’re constantly moving, you’re constantly challenging your senses to see something new, fresh, and different. I’m about to head somewhere more tropical, which is totally different from what I normally do. Getting out into the grasslands, like Nebraska, is so different to me because I grew up in the mountains. When I get to these places that are so different to me, all my senses are firing, and I’m super excited. If you grew up somewhere, you might get complacent. So I think the process of roaming around invigorates creativity and creates a sense of wonder that helps me feel and capture a frame.

Tip #5: Plan ahead.
When we get a location or a direction in mind, I’m usually using a lot of different apps to plan for everything I can. One of the apps, Windy, has a lot of layers and filters you can put on a map so you can watch what the weather is doing — because that’s huge when you’re living on the road full time. It allows me to plan a route based on smoke, fog, temperatures, or anything else to ensure the trip works not just for the shoot but for us as a whole family. We’re mapping out where water is, groceries, gas, propane, things like that. Also, depending on what I’m shooting — such as stars — I’m also looking for what features are in the landscape. So geography is also important. And other apps help me track moon phases, the Milky Way’s visibility, sunset/sunrise times, and things like that. All that gives us a clear map of when we’re supposed to be at a location and how quickly we need to travel.

Tip #6: Go where the story takes you.
Each shoot offers me a different challenge, and that’s why I select them: to help open myself up as a storyteller, a craftsman, and a creator. But there are a lot of times you set out with a specific goal. You feel like you learned so much from previous shoots that you’re going to go into a project and do it the best you’ve ever done it. But then circumstances change — like weather or talent — and the expectations you set for yourself can go awry. You get back from the shoot and you wish you coulda, woulda, shoulda. But you can’t let that stop you. You plan one movie, and you end up shooting a whole other one. Then, when you get to the editing process, you create a whole different one still. When you make a movie or build a shot, you really end up creating three, and you’ve got to roll with it, especially in the outdoor space.

Tip #7: Organize ahead of time so you can grab the shot.
For this particular lifestyle, I have really stout backup drives, a very capable but size-efficient laptop, multiple battery sources with solar, multiple tripods, a wide range of variable lenses, a whole bag of prime lenses for video and for when I want faster glass for a certain shot, a gimbal, and a few different drones. I also have a time-lapse system that I take with me everywhere just in case. As well as a really good audio setup so I can go full production mode and kind of do it all. There’s a lot of time if I’m doing personal projects — so as long as I have a tight kit — I can replicate a lot of cinema. But a good camera pack allows me to stay organized. If you’re not organized, you’re never ready for the shot.
You have to have a checklist. I always keep the same routines no matter what I’m doing, whether it’s a billion-dollar commercial film project or my own. It’s important to continually use those best practices or else you’ll find yourself in rookie positions like, “Oh, I forgot to charge the battery,” or the SD card’s full up.
Tip #8: Composition is key.
I like to talk about motivated design: principles of visual communication by way of controlling the eye. It’s really big when you’re sketching or painting, and a frame is the same way. It takes 30 frames to create one second of video — or a single frame — so you better get it right. I’ve always been taught to look for elements — be it a value or features in the shot — that lead the eye because you want to control the eye to stay on the image. It’s important to think about those things, because that’s the way you can manipulate the viewer to get lost in an image and feel intrigued by it. In motivated design, you’re designing with motivation, rather than just snapping a photo because it looks pretty. If it looks pretty, then you start getting into those principles and looking for those obstacles and values in light, dark, and color theory so you can craft a nice image.

Tip #9: Change your perspective.
We’re all in the height range of about four and a half feet to six and a half feet. That’s where we all walk around. The easiest way to get creative is to get yourself away from that perspective. Get a ladder. Lie on the ground. Get high. Get low. Get away from that standard perspective and instantly, no matter what you’re doing, you’re going to capture something that’s a little bit different.
Tip #10: Do the work but don’t lose the love.
Photography is a lot of sacrifice and a lot of hard work. If you’re not willing to do either of those, and you’re looking for instant gratification, I don’t feel like this industry is cut out for that. There’s a lot of romance in a nomadic filmmaker/photographer lifestyle in general. Now more than ever, young people are getting inspired by a movement that took place via social media, and it looks a certain way. But it’s a highlight reel. I’ve seen a lot of people fail because they leave high school or college, buy a van, and emulate what’s being done. They find they might not have all the tools to be doing it and get into really bad situations. You have to open one door at a time, and you never know where the next door will open, but you can never open the end door at the beginning.
Remember where you came from and why you got into this in the first place, whether it’s video or photo. I’ve seen people imprison themselves because they’ve done something that worked online, and then they’re in fear of doing anything else because it doesn’t get the likes. People then are afraid to share what they truly love to share, and what got them to success in the first place. Make sure you’re always comfortable and happy with what you’re shooting. Don’t shoot for any other reason.

___
Find Andy online:
Portfolio
Flickr
Instagram
___
Subscribe to the SmugMug Films channel to see future installments as soon as they’re released.
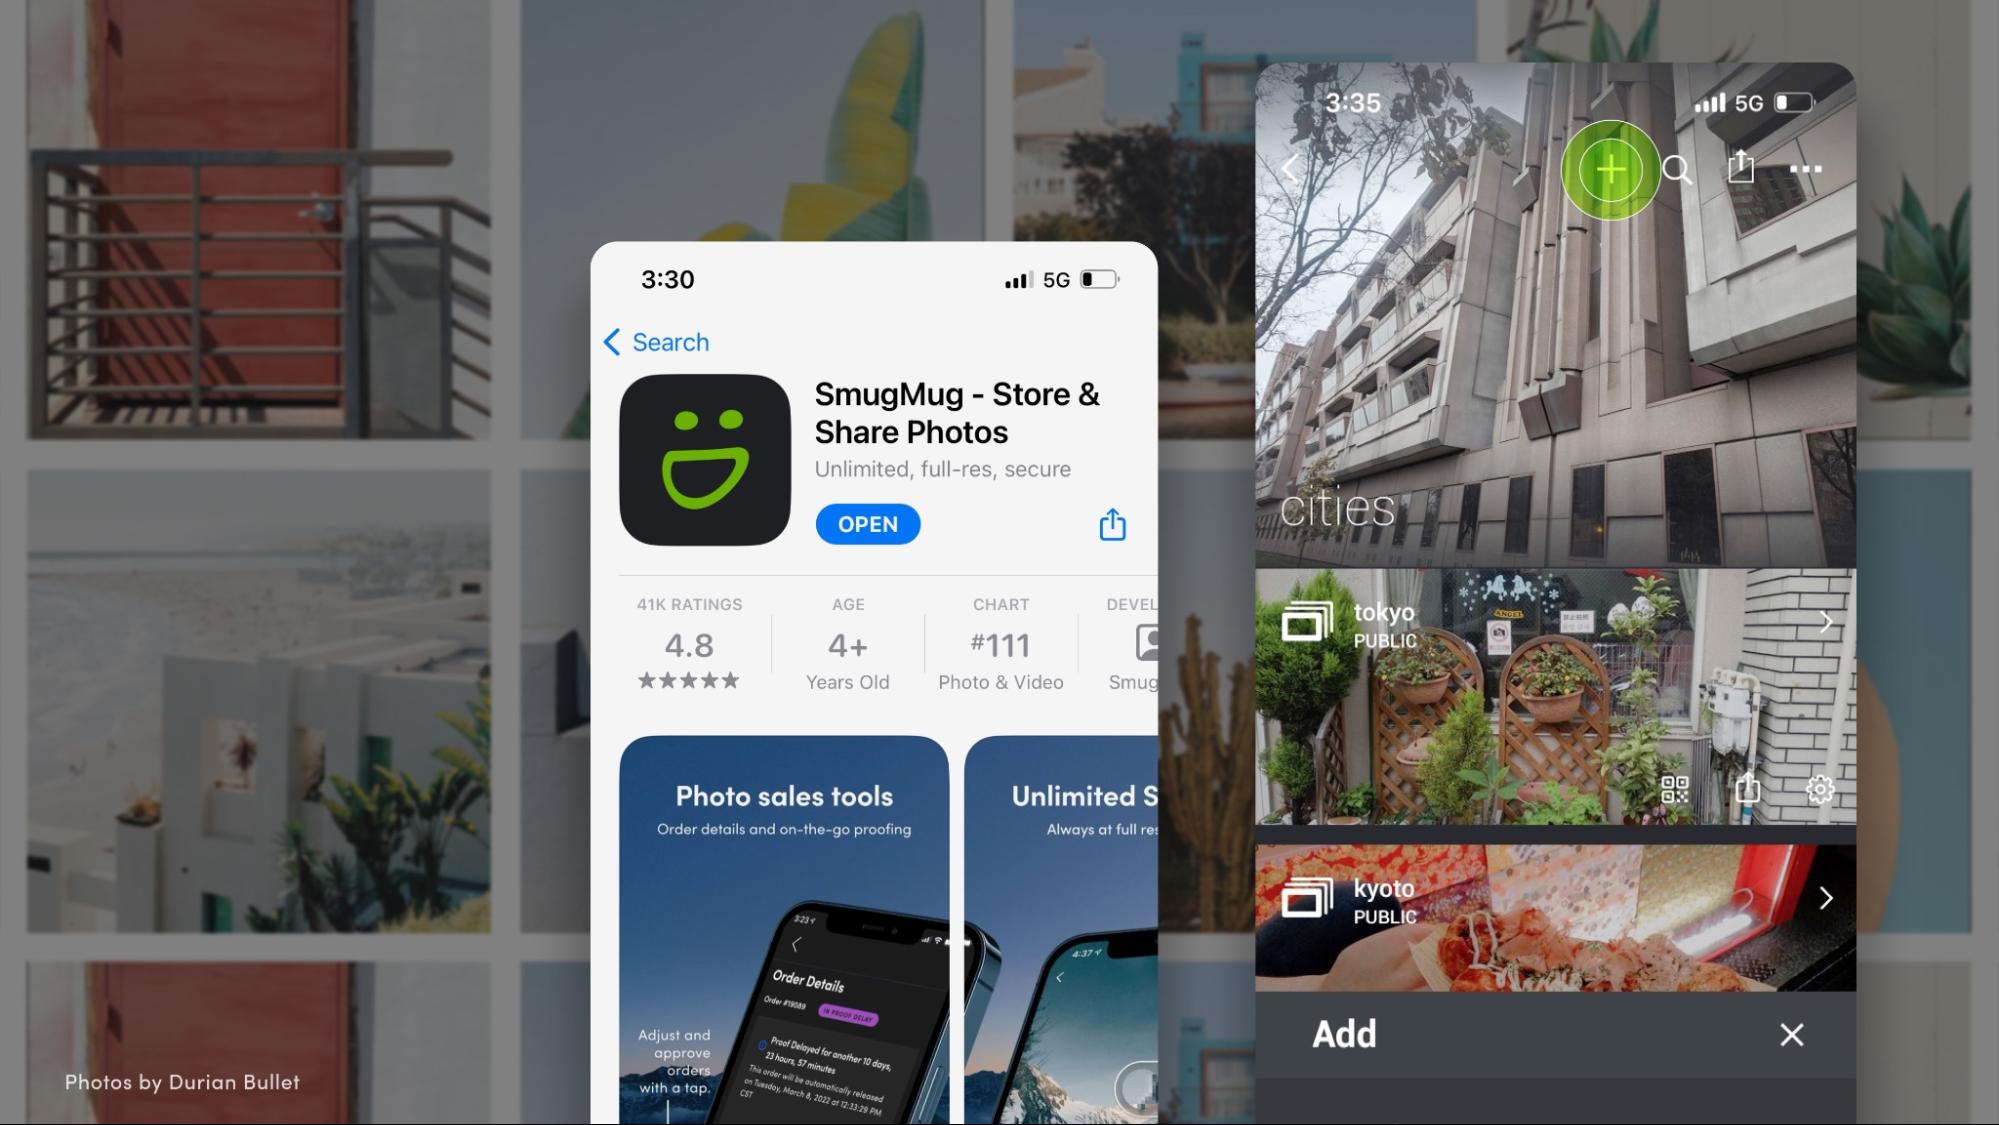
How to keep your phone photos safe, too.
How to keep your phone photos safe, too.
The camera you usually have on you is the one in your pocket: your phone. So it’s probably the one you’re using the most. Making sure our phone photos are securely stored is important, and we’re going to show you how to do it. .
Don’t let your best memories die in a digital graveyard. Get them off your phone and safely into SmugMug, where you can rest easy knowing they’ll be there forever, no matter how many times you drop, dunk, or destroy your device.
Use our free iPhone and Android apps.
If you have an iPhone or Android phone, use our app to browse your site, share your photos, make edits, and automatically back up everything on your phone.
Download SmugMug’s iOS or Android app and sign in to your SmugMug account to get started. When you open the galleries on your site, tap the green plus icon in the lower left to add any photo from your photo library to the gallery you’re in.
Even better, you can set up the app to automatically back up all your photos from your phone to a gallery on your SmugMug site. Just go into the app’s settings and turn the auto-upload feature on. Here’s how to do it on iOS and on Android.
Upload to SmugMug from any iOS app.
You can also upload your mobile photos directly from your camera roll and other apps to SmugMug. This is an excellent way to quickly backup and store your on-the-go photos, which are probably some of the most precious photos we take. So keep them safe!
To do this, you’ll need to have the latest version of the free SmugMug app installed on your device. Simply hit the Share icon in your chosen app, or from the camera roll, and choose SmugMug from the list of available services. In some cases, you may have to look under the “more” option. Here's full details on our help page.
Upload from your desktop to SmugMug.
Even without specific apps, your phone should still allow you to access your images manually so you can upload them to your SmugMug site for safekeeping.
Once you connect your phone to your computer, it’s simply a matter of dragging and dropping the photos you want into SmugMug to begin uploading.
We’ve got several great ways for to get your files into SmugMug; use the one that works best for you. We like using the default browser drag-and-drop window, with the option to automatically skip or allow duplicate files.
Make sure to download and back up your photos on a regular basis so you won’t miss a single memory you’ve recorded. We’ve all had this happen to us, and with SmugMug you can retrieve thousands of lost memories with a single click.
Happy snapping, and remember: always back it up!

How to protect against photo theft.
How to protect against photo theft.
You’re a photographer who makes money from sales, so you’re in control of how your images can and should be used. SmugMug gives you tools to know exactly where your photos are going...and where they’re not.
You can also tweak every setting listed below (except for #8, pricelists) in your gallery settings and save them as a preset. Total time-saver.
Control what visitors see.
1. Set your largest viewing size.
Every gallery on your site gives you the ability to disable your original-resolution images and limit how large your fans can view your photos. We suggest you allow at least the XL display size to create a big impact and allow your potential buyers to see all the glorious detail in your photos. Used in concert with other image-protection features below, your photos will still be safe and sound.
2. Gallery privacy.
Protect your galleries with a viewing password or keep them unlisted to be sure only the right clients with the right credentials are browsing your photos.
Control how visitors share.
3. Share versus owner share.
The Share button is on by default so fans can spread the word about you. If you'd rather be the one sharing, turn this off in your gallery settings. You'll still be able to post and share; the button will instead say "Owner Share" and be visible only to you while logged in.
4. Right-click protection.
With this enabled, we’ll display a message whenever someone right-clicks on your images in your gallery. Keep in mind that snapping a screen grab is a basic function on any computer and isn’t prevented with right-click protection, so we recommend using this feature together with custom watermarking. The result? Your name stays associated with the image, no matter what.
Sign your work.
5. Watermarking.
Put your name, URL, or logo on every photo you shoot. At SmugMug, watermarks are completely non-destructive, meaning they're applied to display copies only. Any print, gift, or digital download purchased from your site will be clean and clear.
Tip: Let your watermarked photos loose! When fans share photos watermarked with your logo, they're doing free advertising for you. So be generous and attract new customers all at once. Win–win.
6. Backprinting.
Add your brand to the back of every print purchased from your site with backprinting (available with Portfolio and Pro accounts). You can customize this with your name, URL, email address or even the image caption so clients know which print is which.
7. Printmarking.
Stamp your prints with your brand. Like watermarks for your purchased items, printmarks are most often used to put your logo or signature on the corner of each print and digital download. It's fixed to a percentage of the area of your print, so don't worry about it taking up valuable real estate.
Charge for the privilege.
8. Set pricing.
It may seem like a no-brainer, but it's important to set up pro pricing on your galleries so you make money on every sale. Start by visiting your pricelist manager.
9. Turn off printing.
Not ready to sell? Simply set printing to No in your gallery settings. This way your clients can browse, but not buy.
What photos sell?
What photos sell?
Have you ever wondered what else you could be doing to get more sales for your landscape photography? Our friend Varina Patel has offered us great info about how to mix business and photography when you’re out and about. Here's what she says about keeping the customer at the forefront of your mind the next time you're out shooting.
You never know what a buyer will want—and each buyer is different. But, over the past several years, we’ve learned a few things about maximizing the potential of our portfolios. Here are a few tips for making sales.
Horizontal and vertical shots.
When we’re in the field, we usually find that a composition works best in either horizontal or vertical orientation. But in most cases, after capturing the most visually appealing image, we’ll work to find another shot that works with the camera turned 90 degrees. Why? Because sometimes the buyer needs an image that works in a particular orientation. Are they looking for a collection of calendar images? They’ll probably need horizontal images. Photos for a magazine? They’ll need a vertical shot to grace the cover
Since you never know who might want to purchase your images in the future, you can’t know which orientation will work best for their needs. Shoot in both orientations, and you’ll be ready no matter what they ask for.
Local images.
Not too long ago, Jay sold a shot of Cedar Falls (titled, The Looking Glass) as part of a collection of fine-art images. He has many shots of waterfalls, and it wasn’t one of his favorites. The image lacks the vibrant colors or grand vistas you typically find in Jay’s more popular landscape photographs. When the client asked about waterfalls, his first instinct was to send them samples of the most popular waterfall images in his portfolio. One of the first shots he sent was Arizona Dreaming, this brilliantly colorful “icon shot” from Havasu Falls in Arizona.
But the client passed on all those brilliant-color and famous locations. Instead, she chose the quieter image…one he’d never sold before. He was curious about her choice, and he asked her about it. The answer was simple: she wanted images of local places, no matter how ordinary they looked in comparison with those famous, iconic locations.
When you approach a potential buyer, make sure you have plenty of local images. Colorful photographs capture the eye of the viewer, but familiar places capture their hearts.
Collections.
When you present your images for sale, consider using gallery features that allow you to group your images into categories based upon similarities. For example, I have a gallery that’s dedicated only to black-and-white images and another that’s just for mountains. You can set up a gallery for images with a dominant blue-color theme or for photographs from a specific location. Your options are wide open.
SmugMug’s smart galleries feature lets you use keywords to create collections so potential buyers view images with shared characteristics. When a buyer wants more than one image, they often have a theme in mind. One buyer asked me for 30 detail shots she could sell as a wallpaper collection. Another wanted several waterfall photographs for decorating a newly opened hospital. In Cleveland, a buyer wanted images of local parks and iconic locations for the walls in an office building.
As you build your portfolio, keep an eye out for images that work well together, and be sure to present them as potential groupings.
Big prints.
Would you be surprised if I told you that giclée canvas prints are some of our biggest sellers? There’s just nothing like a really BIG print that makes a statement or ties a room together. In most cases, I don’t get to see a print after it’s hung, so it was a real treat to be able to see this one in its place of honor over the fireplace. This canvas print is hanging in a beautifully decorated home near Atlanta, Ga.. The colors in the room were actually chosen to match the print—the entire room is coordinated to match the colors in the photograph. I wish I could give you a tour of the whole house, which is a work of art itself.
Canvas prints are more expensive—especially really big ones—but most people hang them without a frame since they stand alone so well. They avoid the expense of matting and framing, making the price much easier to swallow.
Offer your prints for sale on canvas at the largest size available. A photo printed at that size packs a whole lot of punch!

SmugMug Release Notes: July and August 2023.
SmugMug Release Notes: July and August 2023.
What’s new.
- Visual cropping guide overlays — A highly requested feature by our photographers has been the ability to help their customers understand what will be cropped on prints as the format sizes are changed. We’re excited to share that we added a visual cropping guide overlay to the shopping cart. In the shopping cart, your customers will see a red overlay which will indicate what will be cropped when printed and so adjustments can be made accordingly before the purchase is made.

- Permanently delete trash in the Library — We’ve added the ability for you to permanently delete items in your Library trash can. Remember, once you add something to the trash, you still have 30 days to recover those items but you also have the ability to permanently delete them by simply emptying the trash. Be careful using this though. Once enabled, the files can’t be recovered.


What’s changed.
- Moved the Watermark tool access in the Selling Tools tab of the Navigation menu — By removing the Watermark tool from Account Settings and moving it to the Selling Tools tab, this puts all of our tools for sellers in once place making it easier to find. Learn more about how to create and use Watermarks to protect your photos.

- Manage pricelist page update — The look and feel of the page where pricelists are managed has been updated to give clearer indication of which pricelist is assigned as the default for the site. At the top of the page, the default price list will be listed on the left.

- For SmugMug Pro members with assistants — Assistants can now log in to your SmugMug Pro account and the Account Settings page will now say “Account Setting-Assistant View”. This will help with lessening any confusion over which login is currently being used when viewing the account.

- Moved access to proof delay and your sales history to the Sales tab in the SmugMug iOS and Android mobile apps.
Bug fixes.
As always, we have been busy squashing pesky bugs!
- Fixed storage concerns on iOS devices. Added a warning on iOS app to advise if the password is the same as the hint being used.
- Addressed minor checkout issues in the shopping cart and problems with payment on order creation to improve the checkout experience for your customers.
- Resolved small bugs found in your Account Settings including updating an address and adding country information on receipts with VAT charges.
- Fixed some small Gallery and folder issues.
_______
Remember to keep an eye out for updates in the ‘What’s New’ section in your SmugMug account. And, tell us what you think or what features you’d like to see: start a conversation on Facebook, Instagram, and/or X (formerly known as Twitter).

SmugMug Release Notes: June 2023.
SmugMug Release Notes: June 2023.
What’s new.
You can now assign pricelists at more granular levels within your organizational structure: the Folder and Gallery levels.

Simply select your pricelist at your desired level. Remember, at the Gallery level, you can set a pricelist via the Gallery settings as well as through the pricelist itself.
What’s changed.
- Migrated customers using EZPrints for prints to WHCC for print fulfillment due to EZPrints no longer supporting print processing. WHCC is an amazing print lab partner with incredible quality so you and your customers will be delighted with print orders. EZPrints will still be available for providing personalized keepsakes to your customers.
- It is now even easier to find and review default pricelists in the Selling tools section. Default pricelists are clearly visible in its own section.
Bug fixes.
- Found some bugs and glitches and squashed them!
_______
Remember to keep an eye out for updates in the ‘What’s New’ section in your SmugMug account. And tell us what you think or what features you’d like to see: start a conversation on our Twitter, Facebook, and Instagram.

Custom photo pages, no code required.
Custom photo pages, no code required.
Need to make a custom page with text and photo features? On SmugMug, it's as easy as drag, drop, and go. Here's how to build a custom page in three easy steps.
Step 1: Create it.
First, create the page you want. If you want to create an About Me page, for example, start by hitting the Organize link in your site header, then click Create > Web Page.
Give it a name, keywords, settings, and any other information you’d like to add. Hit the Done button at the top of your browser window to save.
Tip: Your new page will appear at the bottom of your folder tree list when you open your site Organizer. You can drag it to any other place (like into a folder) if you want to move it.
Step 2: Customize it.
Next, find the page you just made. You can do this by typing in the URL for it, or you can click the link from the preview window in your site Organizer.
Once you're at your new page, open up customization by clicking Customize Design at the top of your page. To make sure you'll be applying changes to only the new page (and not your whole site), look for the following folder list at the top right.
Browse through the different content boxes available in the Content tab and drag the ones you like wherever you want onto your page.
Tip: A light green line will appear in any spot that can accept a block. If you miss, we'll show you a dotted outline mapping out where valid areas lie on the page. Experiment and have fun!
Step 3: Link it.
You always get an instant, live preview of changes as you’re making them, but to clear the windows, click the Preview button and then Done when you're finished.
Copy the URL for your new page from the top of your browser, then in the Customizer, click to highlight the top-level, Entire Site option from the top right.
If the site design you've chosen comes with a menu bar, click the little wrench to open the edit box.
Tip: If your design doesn't include a menu bar, you can add one by dragging and dropping the Menu content block from the Content > Navigation section.
Click the "+" sign to add a link to the menu. Fill in the copy you want and paste in the URL for the new page you created. Click Done.
That's it! Your new page is ready to be seen.

Create a great experience on your photography site.
Create a great experience on your photography site.
A happy customer is a return customer. Your clients chose you over others because they knew you could meet their specific needs, but your job is much more than creating a few good photos: you need to deliver a quality experience from first contact to getting those prints into their hands.
Make a great first impression.
All websites have some basic, common elements: a landing page, header, footer, content boxes, and a way to navigate from page to page. You can change all these elements using customization on your SmugMug Power, Portfolio, and Pro sites.
In addition to the above, you should include the following:
- Your logo
- Contact information (a must!)
- Navigation
- Homepage description and meta keywords
You can also spice your website up with
- A slideshow or video
- Your most recent uploads
- A search box
- or any of the many different content blocks available on your SmugMug homepage.
Don't hide your email address.
Make use of your built-in SmugMug profile. Add your name or business name, an image of yourself, and a background image to take full advantage. You want this info to be easy to find, either on your homepage or in an “About Me” page.
All SmugMug accounts also get a contact email address to fill in on their profile. That, in turn, creates a contact request form available from the contact link in the footer or in your navigation menu.
Keep your site organized.
While galleries are the building blocks of your site, they can be categorized into higher-level folders up to seven levels deep. Keep your site organized to make things easier on your visitors. Then build a navigation menu to help them get around your site.
A navigation menu is a row of links at the top or side of every page, best used when you link to specific galleries, pages, or folders on your site. For extra assistance navigating your site, consider adding breadcrumbs. These additional links at the top of each gallery easily take your viewers back to a gallery’s category or to your homepage. Nothing's worse than a digital dead-end.
Prevent analysis paralysis.
Limit choices and don’t overwhelm the viewer. Cull your shoot down to the best of the best. Limit the products that you sell as well—price only those that best suit your photos' and your clients' needs.
Then organize your photos to provide a great customer experience in a meaningful and easy-to-navigate way. Your viewer will have an easier time browsing their wedding photos if you take the time to organize them into galleries rather than showing them one gallery with all 1,200 photos.
SmugMug smart galleries can be a real timesaver. Create your galleries and define rules based on keywords, then upload all your photos into a single Unlisted gallery. The smart gallery settings will automatically pull in photos that match your rules based on your keywords.
Take this one step further by making use of events and favorites so customers can pick and choose their favorite photos. Favorites are put into a separate gallery that both you and your customer can see, providing a great way to discuss their choices.
Create a sense of urgency.
Giving clients incentive to buy sooner than later can make all the difference. Try these tips:
- Create limited-time discounts immediately after the event. With SmugMug, you can easily create a coupon good for only a few days to get clients buying while their memories are fresh.
- Try seasonal or special-event discounts. Encourage customers to avoid the Christmas rush by having a special deal available only in September.
- Take galleries offline (make them unlisted or change the password) after a certain date. Just make sure potential customers know this deadline so they know exactly how long they have to browse and purchase.
Creating an easy and user-friendly site will encourage customers to linger on your site: clear, organized navigation, easy-to-find galleries, and a simple list of products they can buy are all incredibly helpful. Try these tips to keep your bounce rate down and your sale rate up.

Photographers: Guide your guests to the gold.
Photographers: Guide your guests to the gold.
As your photo library grows and grows, so does the challenge of keeping track of your memories or your clients' shoots. It's crucial to keep your site neat, and it's exceptionally easy to manage all your folders and galleries with the powerful Organizer tool.
But beyond that, the content you display on your pages is the most important part of your viewers' experience. Think about what a guest or a potential client is looking for when they see your website for the first time. Will they find what they need or will they give up and move on?
How do you go about guiding them to the right stuff?
There are several really great ways to guide visitors that arrive on your homepage to the content that you want them to see most. We've gathered a few of the best examples from SmugMug photographers.
Homepage content blocks.
Choose exactly what to display on your homepage using our drag-and-drop content blocks. You can add any of the following:
- Single image blocks that click through to a favorite gallery.
- Folder, gallery, or page blocks that lead your visitors right to the work you want them to see.
- Video from your SmugMug site, YouTube, or Vimeo.
- A feed from your blog.
These can be used as a “call to action” to move a visitor from your homepage and into a specific selection of pages on your site.
Here are a couple of elegant examples of content blocks on the homepage:
Keyword cloud.
Take advantage of the keywords you've added to your photos to help visitors find the right stuff. You'll find the keyword cloud content block among the discovery choices in the customize content block panel.
Navigation menu.
A well-constructed menu bar allows you to bring attention to the galleries you want to be seen first, and to link to other places around your site: your portfolio, your “About Me” page, your pricing, your contact information, and so on.
The SmugMug default navigation menu includes links to Home, Browse, and Search, but we recommend you add more so your guests don't have to slog through all your galleries to find examples of your work.
Look here to see how to add new links to your menu bar.
Mix and match.
Why choose? The best (and clearest!) way to guide your guests is to use both a well-curated homepage and a well-manicured menu bar.
Here's what we suggest:
- Use the menu bar to link to an About page, how to contact you, and what services you offer.
- Use content blocks to show your fans specific galleries that demonstrate what you do best.
Getting your visitors and potential clients quickly to your best and most relevant content is an ideal way to increase engagement and potentially land that new sale. Have any other tips that you’ve found helpful? Share them with us.
Your new SmugMug photo site in 5 minutes or less.
Your new SmugMug photo site in 5 minutes or less.
Short on time? We get it. That's why SmugMug gives you everything you need to publish your site quickly and easily. All you need to know how to do is click a mouse.
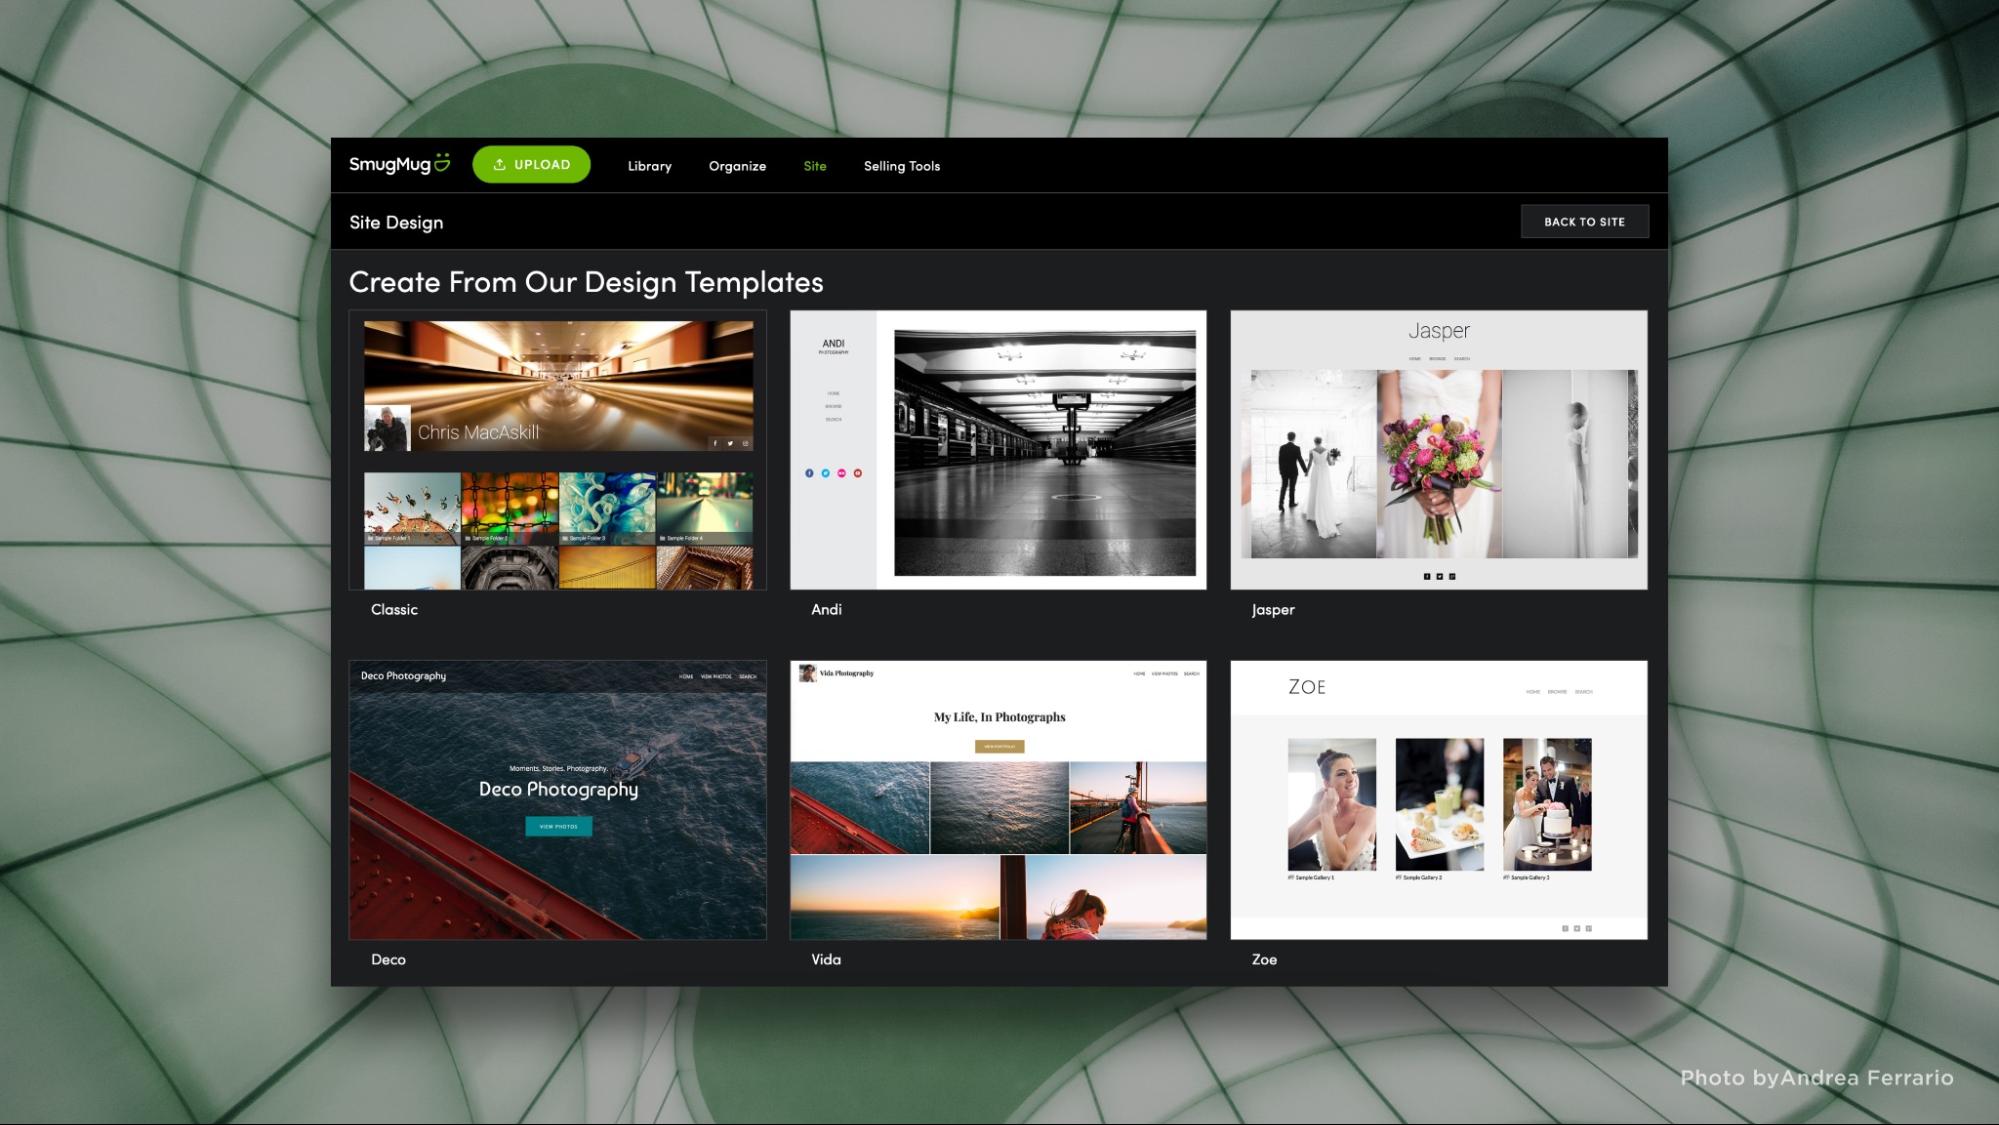
Step 1. Choose a design.
We offer several beautiful site designs for you to choose from, and you can always choose a different template later. Each one comes with an out-of-the-box, designer-approved layout, font choice, and color scheme. We’ve created a variety to fit many styles of photography, so scroll through and pick the one that speaks to you.
Step 2. Add photos.
When you open a new SmugMug account, you'll want to add photos to it right away. There are many ways to upload your photos, from our built-in browser-based uploaders to our publish service for Lightroom users.
FYI: At this point your site is good to go. Simply hit the Show Me My Site button and your new website will be visible to the world! But if you want to make further changes, keep reading.
Step 3. Customize the design.
We make it easy to change the look and feel of elements that appear across all your site's pages. Some examples include adding a background image, including your name in the header, and changing text on your menu bar.
To open customization mode, click Customize Design at the top of your site.
Here are a few things you could tweak first:
- Personalize the header.
Most designs already include a basic navigation bar with a way for your viewers to get back to your homepage, view your site content on a Browse page, and search for a specific photo. You can add more links by editing this content box. - Change the theme.
Designs have their own color schemes, but you can pick individual page colors and fonts if you prefer a different feel. - Adjust the footer.
If you have a Power, Portfolio, or Pro account, you'll see an option to add your name, social buttons, or whatever else you wish to the footer.
Tip: Make sure you’re on the Entire Site customization mode; otherwise, your tweaks won’t show up across your site.
Step 4. Personalize your homepage.
Your design will include various galleries and content on your homepage, but you can edit them (or add more!) by clicking Customize Design and making sure Homepage is selected.
Drag and drop, remove, or edit the individual content blocks that appear on this page. You'll know where they can go when you see a highlighted arrow and green line appear. Note that you can stack content blocks one atop the other, or line them up to create columns across the page.
Tip: The page elements are color coded, so you can edit any level content block from any page. For example, if you click the Customize Design button from within a gallery, you can still tweak sitewide things like the header and footer.
Step 5. Publish!
Once you're happy with the content blocks you've arranged, you can click Preview to see your changes without the customization menus covering the screen.
Love it? Hit Done. Your new site is now available for the world to see. Congratulations!
(Bonus) Step 6. Keep going!
Your design will have the essentials already built in, but with a Power, Portfolio, or Pro account, you can add more pages to suit your style. For example, you can create an “About Me” page with your photo and bio, a “Services” page, etc. Simply click the Organize button at the top of your homepage. Once inside the Organizer menu, choose Create > Web Page and name it.
Next you’ll see your brand-new page. From here, you can customize and add in any content blocks in virtually any configuration you want. When you're happy with it, publish your changes.
If you’d like to make your new page easier to find, open customization mode and mouse over your menu bar. Click to edit it and add a new link, then find the link to your new page within the Pages I Choose picker menu.
Tip: You can drag to rearrange the different links in your preferred order.
And with that, you’re done!

Photo Seller’s Foundations: Putting it all together.
Photo Seller’s Foundations: Putting it all together.
You made it! After learning about products and pricelists, coupons and discounts, and connecting with customers, you’re ready to put it all together into a marketing strategy that will help you drive more sales for the holiday season and all year round.
Today’s post is all about managing the moving parts of your promotion ahead of time. Think of it as planning now, so your future self can relax and rake in the sales.
(If you really want to get ahead, we recommend reading through the Marketing for Photographers ebook as well. We can’t offer extra credit, but hopefully you get some extra cash!)
The story so far.
Here’s a quick checklist of the activities you can do (or might have already done) to prepare for your sales push:
1. Choose your products.
- Update your pricelists and tweak as needed.
- Add seasonal items to pricelists.
- Make a gallery of new or best-selling photos.
- Create visual assets for items you want to promote.
- Pro option: Build product packages to boost bulk sales.
2. Pro option: Build a promotion to excite your customers.
- Create a coupon or coupons for your sales push.
- Create visual assets for email and social outlets.
3. Lay the groundwork for outreach.
- Update your email list with your most recent customers.
- Update your website with SEO-friendly terms in your titles and image descriptions.
- Pro option: Add your coupon(s) to a banner on relevant pages, galleries, or your whole site.
You’ve done a lot of work to get here, and you’re almost ready for showtime. All this potential needs a plan, though. It’s time for a content calendar.
What’s a content calendar? How does it help sell more photos?
A content calendar gives you a bird’s-eye view of all the ways you can interact with your customers over time. It shows your communication channels (like your website, email list, and social media outlets) on one axis, and the date on the other, letting you plan and visualize where and when you want particular messages to connect with your future customers.
Content calendars are especially useful for creative businesses who need to spread the word about their work. Why? Because they’re efficient: You can create a single asset—like a blog post, a video, or a gallery—and build a whole raft of communications to promote it across your channels, where you’ll catch the attention of different audiences on each channel.
This means more eyes on your photos, more traffic to your site, and more chances to make the sale.
How to make a content calendar work for your photography.
Picture this: you make a gallery of your best-selling photos for the holidays (we told you it’d come in handy).
Then you make a coupon for those photos.
You promote that gallery and discount with a simple shout-out to your email list.
Then you tweet about it on Twitter/X one day. Post a teaser image on Instagram the next. Poll your followers for their favorite photo on Facebook.
Maybe you throw one last reminder to your email list as the promotion is about to expire.
And all of a sudden, presto, you’ve got a marketing campaign.
Follow this approach for other galleries, new products, or upcoming holiday promotions, and you can start to see how a content calendar will help you keep everything organized on your end, and keep your customers coming back for more.
Content calendar essentials: Framework.
Building a content calendar is easy. You can start with something as simple as a spreadsheet— in fact, most fancy content calendar tools are based on just that.
To make things even easier, we built you a template you can use to get started for the upcoming selling season. Just click the image below to download the file, then open it in your favorite spreadsheet app.
Some businesses use content calendars to plan a full year in advance. Others may only use them for specific campaigns or particularly complex projects. For our purposes, a few months will do nicely.
Content calendar essentials: Channels.
With the “calendar” part taken care of, let’s look at content. For each channel, it’s important to consider what kind of content you want to put out there, and how to play to the strengths of each. For example:
- Instagram is likely to be at the top of your list as a photographer, and for good reason. The ability to share photos, galleries, and videos makes it a natural fit for photographers looking to grow their business, and stories provide a fun way to engage with followers in a low-stakes, casual way.
- Facebook can be used to engage with your followers while they’re scrolling through their news feed. Its flexible tools can help you craft just the right kind of eye-catching post, and fun options like polls and surveys give you extra insight into what your audience engages with the most. Facebook’s paid marketing capabilities also let you target an audience much more specifically, getting just the right eyes on your photos.
- Twitter/X is excellent for engaging with your followers because they have direct access to you. By setting up notifications and monitoring your account activity, you can be quick to answer questions, address feedback, and turn interactions into business opportunities.
- YouTube is your home for all things video and a great place to try out some non-photo content. Your videos don’t need to be polished, big-budget productions—you can craft a personal hello to your followers, a preview of things to come, or show off your latest print unboxing with a simple smartphone.
- LinkedIn is often overlooked, but it’s a great asset for professional development and business growth. Building your brand, sharing your business wins, and networking with other photographers are all easily accomplished here.
Feel free to add any communication channels you like to the document (Pinterest? TikTok? Go wild), and let’s dig into scheduling.
Content calendar essentials: Scheduling.
Scheduling is the most personal part of your content calendar creation process, and it will be wholly unique to you and the type of campaigns you want to run. To get you started, though, here are a few important dates to keep in mind this season:
- Thanksgiving—November 25
- Black Friday—November 26
- Small Business Saturday—November 27
- Cyber Monday—November 29
- #GivingTuesday—November 30
- Hanukkah—November 28–December 6
- Christmas Eve—December 24
- Christmas—December 25
- Kwanzaa—December 26–January 1
- Boxing Day—December 26
Upcoming holidays are called out in the content-calendar template, and we’ve gone ahead and populated the first week with a sampling of emails, posts, and assets to get you started. You’ll also want to keep an eye on shipping deadlines so you can let your customers know to order in time for the holidays!
Just like emails, you can draft and schedule your social media posts ahead of time using tools like Facebook’s native scheduler, or try an all-encompassing tool like HootSuite.
Whichever tools you use, a little up-front planning can make your selling season a breeze, so get out there and get posting.
You’ve got a solid foundation. Time to build.
Thank you for joining our Photo Seller’s Foundations series. We hope these tools are helpful for you this selling season, and, as always, our sales specialists are here to answer any lingering questions you have. We can’t wait to see your photos out in the world.
Four steps to improve your SEO on SmugMug.
Four steps to improve your SEO on SmugMug.
Optimizing your photography website for SEO is easy. Whether you’re trying to sell more prints, attract new portrait or events clients, or simply get more eyes on your work, you can do it by following a few simple steps.
Step 1: Add and edit content.
Content is what search engines use to identify what is on your page. Although some search engines like Google use natural language processing to try and understand what each word means, the more specific in text you can be the better.
Your easiest SEO win starts here: go through your website and find headers, page titles, and blocks of body copy, and review them for simplicity and clarity.
Instead of saying “The stunning skies over mountains in Utah’s national parks” in a gallery header, maybe say “Art prints of the mountains and sky in Zion National Park”. Both of these will tell a visitor similar information, but the second version is easier for a search engine to understand, making your page that much more likely to be found.
As you’re reviewing your content, look for opportunities to build internal links. These are the linked words or phrases on most websites that help guide a user to the information they’re looking for. For example, your “Art prints of the mountains and sky in Zion National Park” might add an internal link to “Art prints” that leads to your catalog page, where users can browse the full variety of products you offer.
The keywords you use for these links help your visitors find the pages they’re looking for, and search engines use them to determine what each page is about. But be careful not to link off of the same words to two separate pages. This will cause confusion for search engines and potentially your customers.
Search engines will also look at the amount of links pointing to each page on your website. The more links you assign to a specific page, the more important a search engine will think it is. This gives that page more priority, so make sure your main galleries, signature shots, and business-generating pages are linked to from as many places on your site as possible.
Step 2: Name your images and galleries.
Just like the copy on the page and the internal links, wording matters on your images and galleries. Naming your images includes the actual name of the image, the title tag, alt tag, and the description.
These elements are used both by browser helpers for people with disabilities and search engines to understand what the image is about. A lack of image titles, tags, and descriptions makes it harder for a search engine to understand what the image is, so the search engine will likely choose another photographer’s work to display over your photo.
Your words matter here as well, especially regarding genre and location. If you are selling a print of The Vessel in NYC, name your photo “fine art photo of The Vessel building in NYC”. If you are a sports team photographer, name a photo “Soccer team group photo New Orleans”. Including specificity in your naming and tagging will go a long way toward getting your work found.
The naming and structure of your galleries also contributes to your site’s SEO. Start with the overall theme for the main gallery and then add in niche galleries underneath.
For example, you could create a gallery called Assateague Island Photos that houses all of your favorite shots from this specific place. Inside this gallery you could build sub-galleries like “Assateague Beach Photos”, “Assateague Island Wildlife”, and “Camping Photos on Assateague Island”. Under wildlife you could even build sub-galleries for the island's famous inhabitants like wild horses.
By naming your galleries you ensure that your visitors and search engines both have a clear understanding of what is on a given page. As you add copy and internal links, you’re also providing easy navigation to help people find the exact shots they’re looking for.
Bonus tip - do not erase your EXIF data. Google and other search engines can use this information to determine where a photo was taken and to verify the photo is actually of the area you claim it is in the title, name, and description. When uploading to SmugMug, we keep your EXIF data intact by default.
Step 3: Register in Google My Business.
Google My Business is a free service that helps Google understand what you do. You’ll want to create and verify your account and then make sure you fill out every field possible when registering for this service.
Make sure to define the area you serve (statewide? A few counties? Just in the city? Be specific!), list out the services you offer, and add hours of operation.
The more complete your answers are, and the more often you update your listings, the more chances you have for your business and your photography website to show up in local search results like “portrait photographer in Tulsa” or on a map as someone is looking for “holiday card photographers near me”.
For that second example, you can amplify your SEO by building a dedicated holiday cards page on your website, then updating your My Business listings with your new service, and even a discount if you’re a SmugMug Pro subscriber.
Step 4: Build backlinks.
Once you have content that defines your pages, your images are named and tagged, and your account on Google My Business is completed, you need to build what SEO experts call authority. This is how trustworthy or reputable your site is considered, and can be done through citations and backlinks.
A backlink is a link from an external website to your SmugMug website. It’s important to make sure these links are naturally occurring and come from a trustworthy website like your local news, trade publications, other businesses, or niche blogs.
Often, professionals looking to increase their SEO will collaborate with each other, trading blogs and features to drive traffic to each of their sites while building authority. This can also be done through PR outreach to local publications and news outlets when you have something big to announce!
For example, if you’re hosting a workshop on wedding photography, you could ask a wedding blogger to give you a shout out on their blog, reach out to venues and vendors you partner with and ask them to list you as a resource, and let the local news know about your event.
Just be sure you’re not spamming links to your website on forums, blogs, or irrelevant websites—these will get you penalized by search engines. If you look for natural fits for your photography, you’re likely to find lots of opportunities to connect.
------
These four easy steps will help you get found by search engines and customers alike, so get to it and good luck!


