Editing
Prep your files for great prints.
Prep your files for great prints.
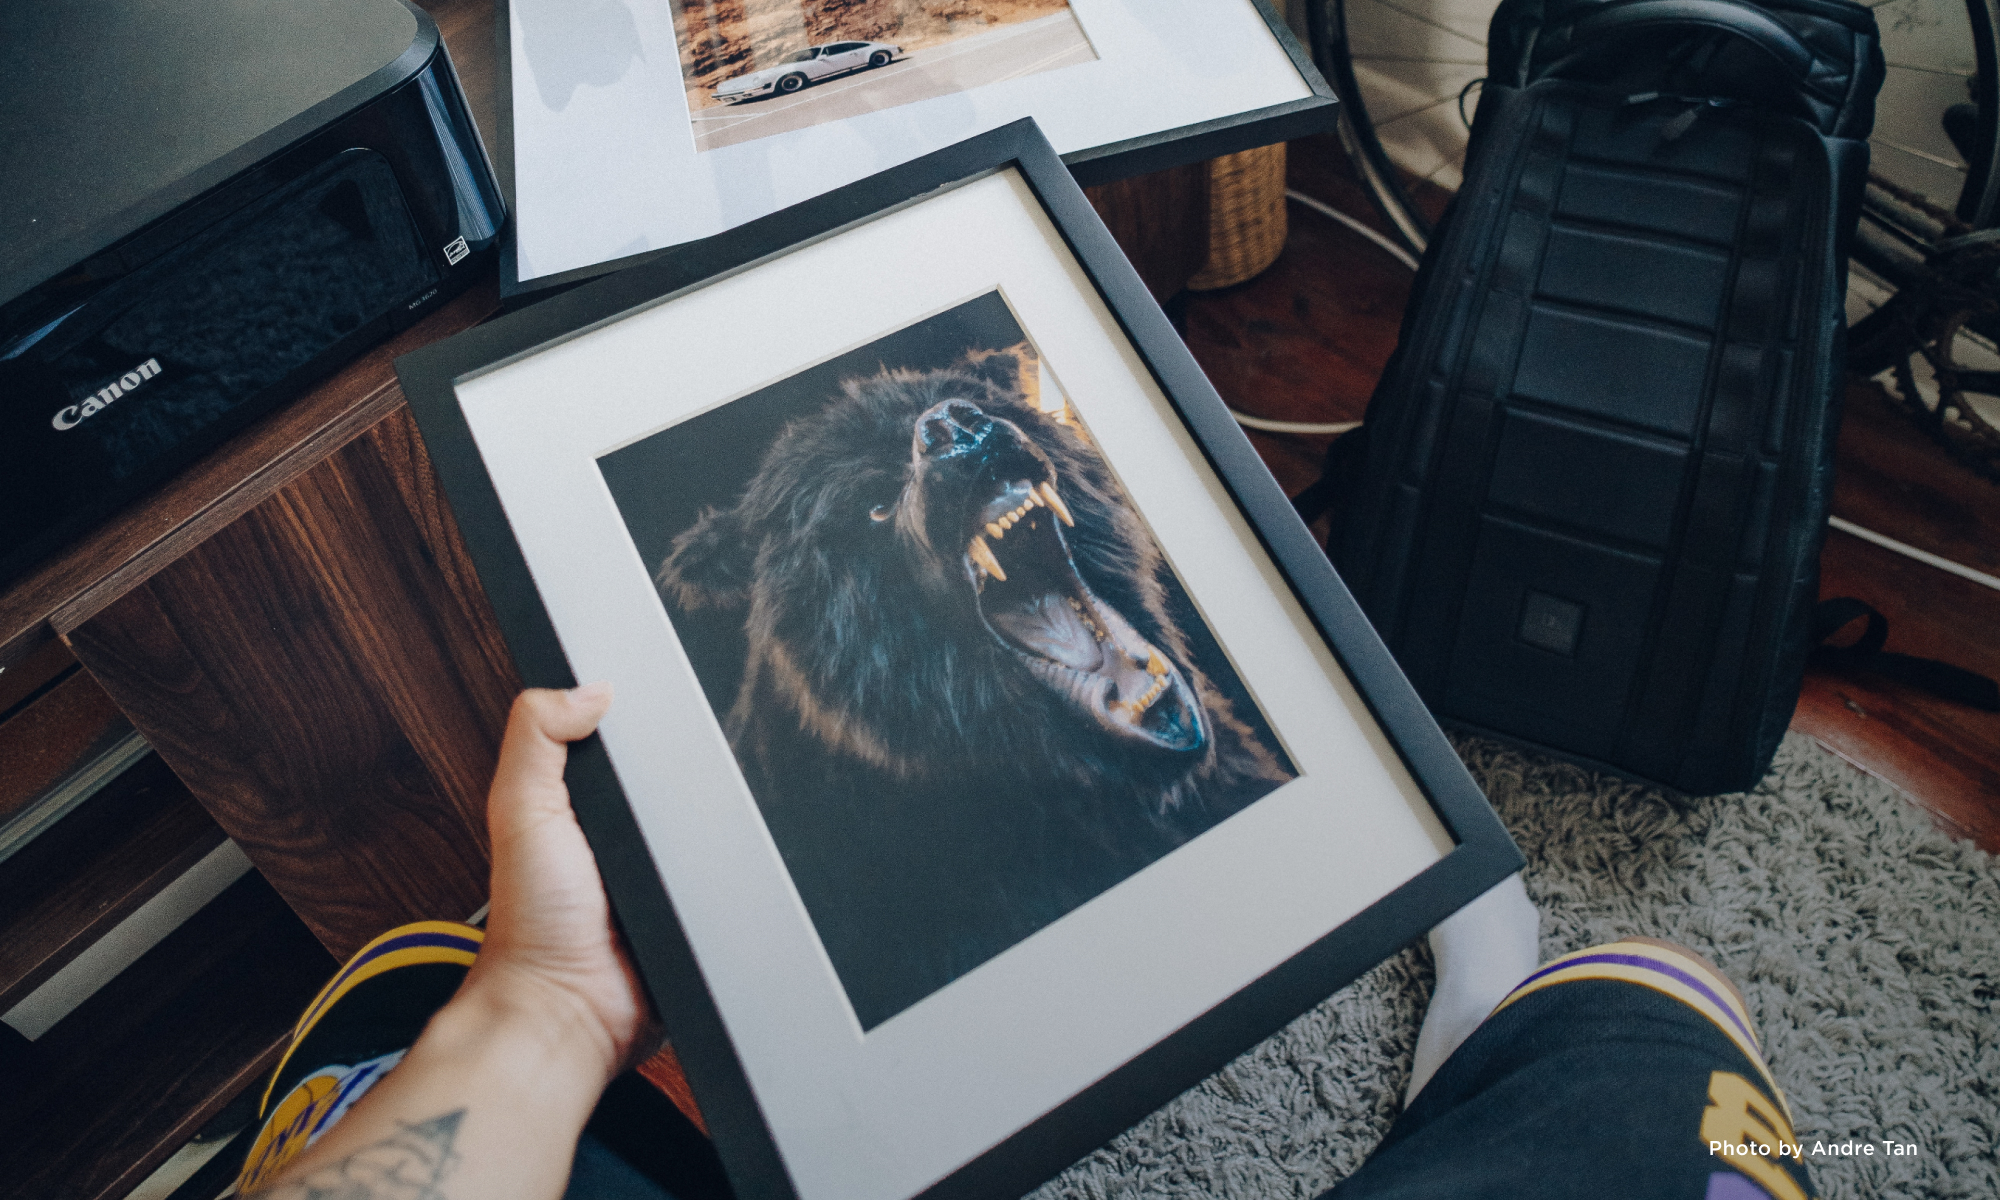
Ready to print big? The topic of file prep may not be exciting for everyone, but there are a few important things you should watch out for before you send your files to the lab.
Here's a checklist from our in-house print experts to help you turn your favorite images into perfect prints, and to avoid seeing imperfections blown up super-sized on the wall.
1. (File) size matters.
A key factor in getting stunning, large prints is having enough high-quality information in your starting file. Image file size is measured two different ways:
- MP (megapixels) are a representation of the dimensions of the file (length and width) and are determined by the size of the sensor in your camera. If you don't crop your original file, then your photo will have the same number of megapixels as your camera sensor.
- Mb (megabytes) is a representation of the quantity of data in the file. A colorful image will be larger than a black-and-white image, for example, and a busy street photo will be a larger file than a photo of a plain, blue sky.
The bigger you want to print, the larger the file size needs to be. As a rule of thumb, you need a minimum of 1 Mb and 1 MP in your file to print small, standard print sizes up to 8x10 inches.
To check the file size on your computer, open Image Properties and check Image Details on your photo. To check in your SmugMug gallery, click the image information icon that appears in Lightbox view.
For a more advanced trick to check your image quality, try these steps in Photoshop:
- Click Image > Image Size.
- Set Image Resolution to 90 pixels/inch.
- Check the box for Resample Image.
- Set Image Size to your desired print size.
- Click OK.
- Zoom viewing magnification to 100%. This should give you an accurate representation of what the printed image will look like. If it looks pixelated, then you’ll need to choose a smaller print size.
- Make sure you don’t save these settings to your file.
Tip: Image size does not trump image quality. If your original image is out of focus, no number of pixels will fix it. Always start with your best-quality photo.
2. Shape is everything.
Your digital file will have a shape that's been determined by either the camera sensor or by any cropping you do to the file. All print products also have set dimensions and specific shapes. They range from squares to rectangles, and every variation in between.
If your digital file doesn’t have the same shape as the print product you want to order, you’ll need to crop that image so they match. You can do this in your editing software of choice or on SmugMug after you upload.
3. Be wary with borders and text.
Does your image have a border or overlaying text?
- Make sure your borders are at least ¼-inch wide or they will be at risk of getting cut off and/or appearing uneven on the finished print.
- Make sure text is at least ¼ inch away from any edge of the print (or within the crop box for mounted prints) to prevent it being cut off during the printing process.
- Double-check all text for typos.
4. With flying colors.
Get those whites white. Our eyes judge all colors by using black and white as the reference points. Make sure you have a true white point (255, 255, 255) and/or a true black point (0, 0, 0) in your images.
Watch those skin tones. In portraits, pay close attention to your skin tones. You'll want pleasing skin tones, generally warm rather than cool.
Don't be fooled by screen brightness. Our computer monitor, tablet, phone, and camera LCDs are all backlit devices. They will always display our images brighter than any physical print. Be sure to adjust for this, otherwise your prints may end up much darker than you expect.
Tools to help:
- Color calibrate your monitor, either with a calibration print (our preferred method), your computer's system preferences, or by using an actual color-calibration device.
- Use the print lab's supplied ICC color profile.
- Use editing-software histograms, levels, and curves tools for editing color and exposure.
Tip: Does this all make your head spin? Try using SmugMug's color correction whenever you order a print through our print labs.
Kickstart your Lightroom workflow.
Kickstart your Lightroom workflow.
Attention, Lightroom lovers! Today we have a post by our friend, Matt Kloskowski, founder and CEO at Matt Kloskowski Photography and Education, former education director for Kelby Media Group, and a Tampa-based photographer. Kloskowski is the author of several best-selling Photoshop books and teaches Photoshop, Lightroom, and photography seminars around the world. He hand-picked a few favorite ways for Lightroom users like you to get your photos finished faster. He's currently promoting a new "Goodbye, Lightroom" course to help users transition from Lightroom Classic (the desktop-only version) to Lightroom (the cloud version).
We've all heard the phrase "time is money." Well, if you're shooting weddings or events, you need to get through your photos and get them organized quickly and efficiently. Then you can get on to the good stuff: editing and getting out there to shoot more photos. So to help out, I've compiled my favorite tips to kickstart your workflow and keep you moving through Lightroom as quickly as possible.
Tip #1. Use flags instead of stars.
A big part of speeding up your workflow is identifying your favorite photos. If you look under the Photo menu, you'll see Lightroom has two ways of picking your favorites: Set Flag and Set Rating.
Ratings are difficult to work with. Most people are familiar with the 1- to 5-star rating system, but the main drawback is it has too many choices. Five stars is a keeper, right? Four stars probably means the photo is pretty good. Three means it's decent. Two would be bad. And one star would be a reject that you throw away. But what happens if you go through your photos and come across something that isn't a throwaway or isn't an absolute keeper? You sit there and debate whether it's a two-, three-, or four-star photo. Either way, it's not your favorite, so you'll probably never do anything with it. Yet you're giving it too much time in the rating process. And, inevitably, when something takes too long, we stop doing it.
Instead of using ratings, try using the flagging system. This way, you get two choices:
- Flagged means you like it.
- Reject means you don't, and you want to delete it.
Go through your photos quickly and hit "Z" to flag or "X" to reject. If you don't flag it or reject it, then it stays unflagged, which is that grey area you're just not sure about. But you don't have to press a key to be indecisive—Lightroom just assumes you're indecisive about the photo by leaving it unflagged. So your job becomes really easy! Flag it if you like it and think there's a remote chance you'll do something with it again one day. Reject it if you don't. Then hit the right-arrow key and move on.
Tip #2. Delete the bad stuff (and an easy way to do it).
Another way to speed things up is to keep your library as clean as possible and get rid of the stuff you’ll never use. If you followed the previous step and are using the flag system, you should have some rejects that were marked with an X. A simple way to delete them is to select the filter icon near the search bar at the top of the window and then select the rejected-photos flag. Select all the photos in the filmstrip at the bottom and right-click > delete. Lightroom will delete all the rejects at once so you don't have to go back and get rid of them later.
Tip #3. Use albums.
Using Albums in Lightroom is more important than ever and probably one of the fastest and best ways for you to speed up your workflow. Photos that go into an album are photos that should be one click away and the photos you'll want to see most often.
Let's say you have 2,000 images from a wedding. You want to quickly show them to the bride/groom or family. Do you go through and show them all 2,000 photos? No way! Instead, you create an album. It's a way for you to get to your favorite photos in just one click.
Typically, I'll look at my photos and go through them one by one. I'll hit the letter Z to flag photos as a favorite when I come across them. Then I can quickly sort to see only my picks by clicking the flagged icon in the Filter strip.
Once I've figured out what my favorites are, I select them all (Edit > Select All), go to the Album panel, and create a new album with a descriptive name (usually the last name of the bride/groom).
Tip #4. Use folders.
Albums have an extra level of organization called Folders that are key for events like weddings. Think of a folder set as a group of nested albums. If you put your picks from a wedding/event into an album, you'd have all the best photos from all parts of the wedding in one place (the album you created). The problem is that this album could be huge. This is where folders come in.
You'd create a folder (for example, a top-level folder with the bride/groom name) and then create albums within the folder for each part of the wedding (formals, church, reception, etc.). Here's what a folder could look like in Lightroom:
Bonus tip: Get them uploaded safely.
Once your photos are all cleaned up and ready to go, you're just a few clicks away from uploading them safely into your SmugMug website. The publish plug-in is free, gets your photos seamlessly into SmugMug, and also lets you sync, make galleries, and keep your online presence as clean and organized as your Lightroom library. You can also see and adjust your customer's event favorites, republish, and even proof your orders all right within the SmugMug Publish module. Get it now.
_______
What Lightroom tricks have cut time off your photo-editing workflow? We'd love to know!


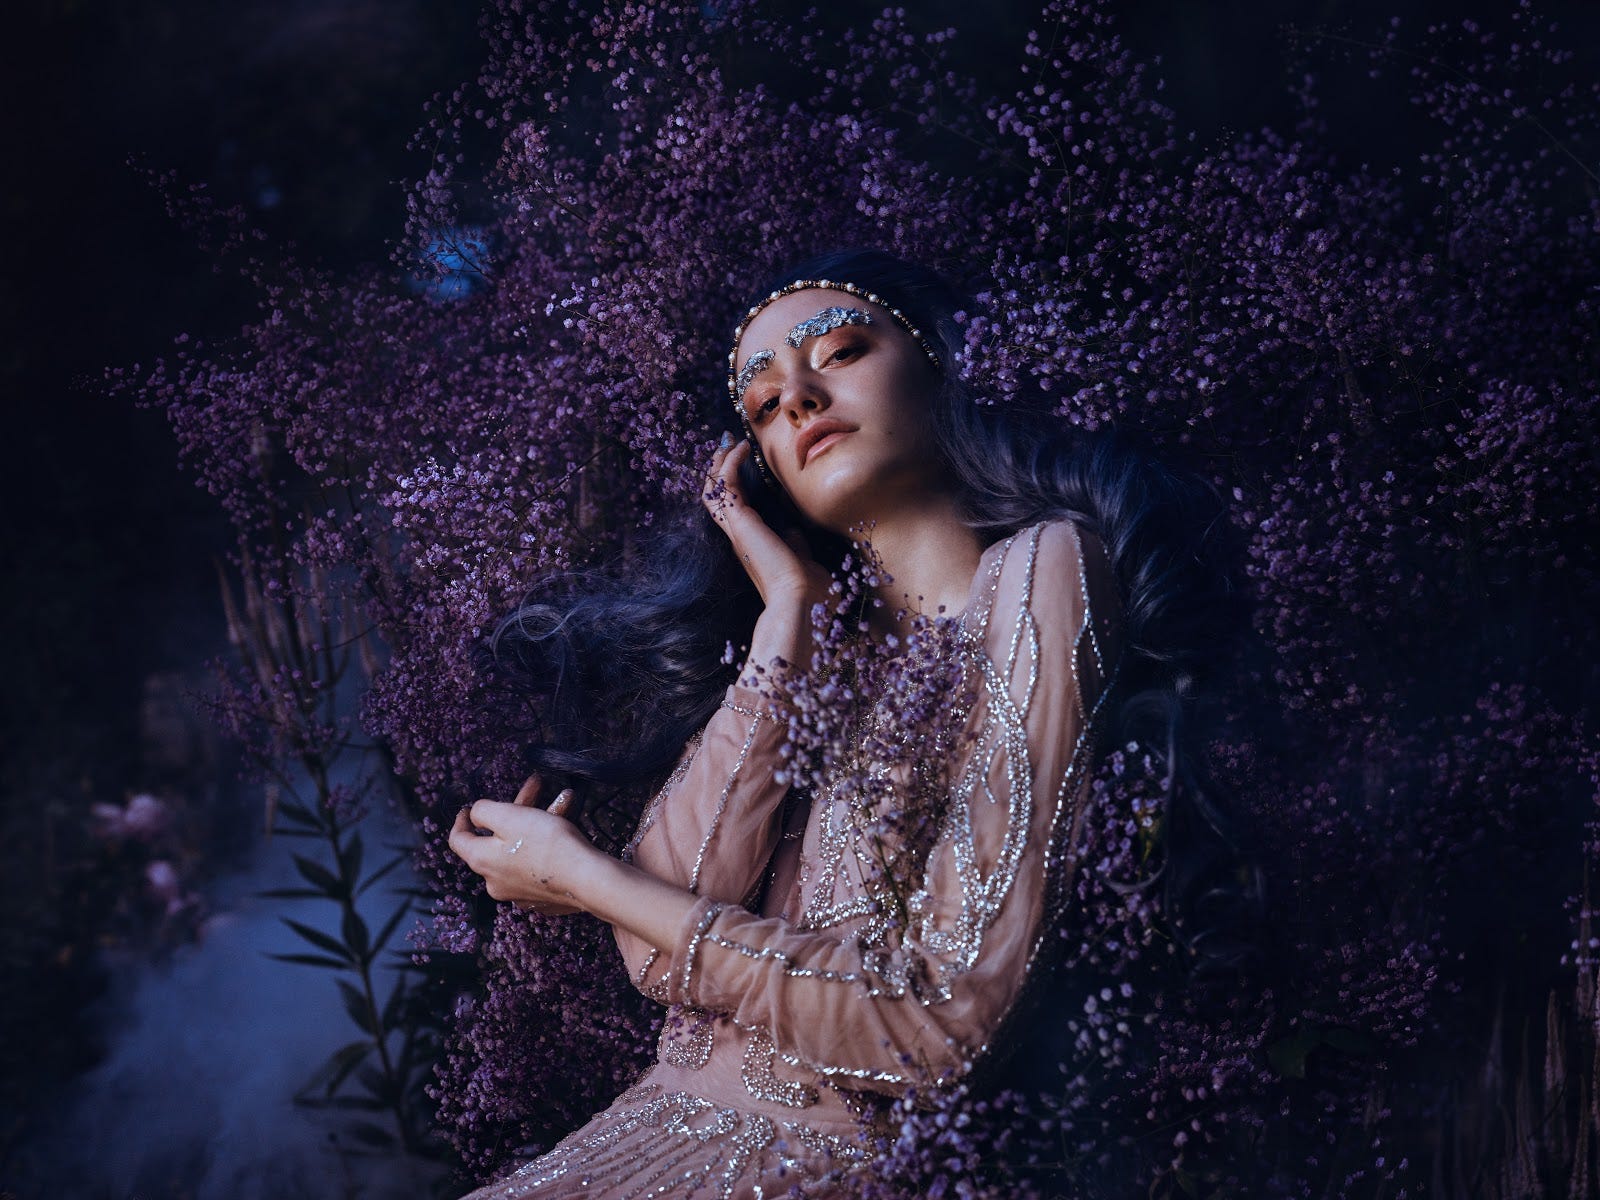
Fashioning fantasies with Bella Kotak: 10 tips for getting started with creative portraiture.
Fashioning fantasies with Bella Kotak: 10 tips for getting started with creative portraiture.
Bella Kotak’s fascination for capturing moments began while she was young. Influenced by her father who brought a camera with him everywhere, she inherited the habit and became known for it among her friends. This obsession for capturing moments eventually led to creating her own—and she found herself shaping worlds, stories, and characters around the moments to help evoke the moods she wanted her images to convey.
SmugMug had a chance to peek behind the veil of Bella’s fantasy worlds and learn a bit about the magic she creates in front of the lens. Discover more of what captures her imagination in our latest SmugMug Film below, and read on for a few of her tips about creating a little magic of your own.
Tip #1: Try everything once to learn what you like—and what you don’t.
Whenever you’re starting out with something, give everything about it a shot. That was my own approach with photography. I was vaguely interested in it, so I tried photographing families, portraits, pets, weddings, and a bunch of other things. Unless you try it, you won’t know if you like it or not. The more I tried, the more I could rule out what didn’t bring me joy or the sense of fulfillment I was chasing. Eventually, my interest narrowed to storytelling and escapism. But I got there by first trying many things and narrowing them down to my core interests—and then seeing what I could do in that world.

Tip #2: When you find a focus, begin with what’s familiar.
If you want to get started with photographing portraits but don’t want to start with photographing your family or friends, start with yourself. I started taking self-portraits to build up my confidence to begin shooting with friends. And I used Flickr to share those images, which helped me connect with like-minded people and get feedback to improve my work and continue building my confidence. Then I started to shoot with my friends and the people I would meet through Flickr. Just start building your portfolio from there and see where it goes.

Tip #3: Be crafty; be thrifty; and be social.
I recommend to anybody who’s starting out with this type of photography to place a lot of their effort into creating their portfolio. By that I mean whatever you can do on your own, do it. For example, I didn’t have access to stylists or designers when I first started out, so I would visit thrift shops for clothes and I would reach out to designers online on the off chance they might lend something to me. Initially, I placed my effort into capturing images I knew I could execute beautifully; once I had a decent portfolio, I used that to reach out to designers and other creatives within the industry. This approach gives them a chance to see what you’re capable of.

I’d also recommend participating in online social groups. I created a Facebook group called Fairytales and Fantasies Photography (with Bella Kotak). It’s a bunch of us who are interested in this type of photography and share images, but it also includes people who design things. It gives us a way to collaborate and help each other. Don’t be afraid to reach out to creators you find inspiring on platforms such as Instagram and Facebook. That way you start to create a relationship that can then, in the future, lead to working together.
If you like making things at all, don’t be afraid to craft things on your own, either. I make props whenever intuition strikes. For one of the shoots we did for the SmugMug Film, I had loads of newspapers and the brown packing paper that you get from Amazon, and I thought, “Let me see what happens if I make something from this.” I started rolling the papers up and using masking tape to hold them together, and suddenly a butterfly emerged. I decided to use that butterfly as a headpiece, and it became the starting place for the whole look of that shoot. That image didn’t exist until I created something from scratch.

Tip #4: Fashion helps tell the story.
Fashion is just as important as every other story element in your image. It sets the scene for the character we are playing with for that shoot. For example, one of my favorite shoots is a girl wearing a simple linen dress, because that evokes a sense of freedom and child-like innocence, and then we set her up in an elaborate scene. There’s a really nice juxtaposition of the stories and elements. Then there are other shoots I’ve done where the background is plain and I use fashion as a way to create a dominant character. Perhaps she’d wear something akin to armor and have an elaborate headpiece, and then we’ll style her wig so it’s fierce. Suddenly, a very soft-looking model can turn into quite a dominant character. And all that can be achieved through fashion choices.

Tip #5: Don’t get stuck chasing the vision.
When creating fairytales, you can have these fantastic visions in your head of what the final image should be. Sometimes you can get a bit overwhelmed by what you want to create and then feel underwhelmed by what you end up actually creating. It can feel like you didn’t do the vision justice, or you didn’t have the right skill set or the right tools. That’s something I know I struggle with.
I get around it by giving myself a break. It’s okay if I don’t realize the full vision; it’s important to have a rough idea. And I treat that as a starting point. If I’m chasing the initial vision while I’m shooting, and I’m not getting the right feeling when I look at the back of the camera, I switch it up. I know when I feel a particular way on a shoot that whatever comes from it is going to be a good thing, so I always end up chasing that feeling instead of the original vision. It’s okay if it doesn’t match, because ultimately that feeling leads me to a better idea.

Tip #6: Make the goal to please yourself—no one else.
Many of my favorite shots have happened on days where the initial vision had to be scrapped because conditions didn’t allow for it. For example, our goal was a dark, moody shot and the weather was bright and sunny that day. However, all that meant is I had to look elsewhere and figure something out. Then something beautiful resulted that wasn’t planned, but it’s more special because of that. Because what I’m always looking for is mood—an emotion. Something that speaks to me as I work on it. If I love a particular shot I captured, then I know it’s probably going to move somebody else viewing it. Sometimes images say more about us as a photographer than they do about the subject itself. Trust in yourself, and you can surprise yourself. I look to be moved by my own images, and that’s why they’re all so special to me. Because I cannot control what other people think of them, but I can control what I think of them.

Tip #7: Don’t fix it in post.
I originally started my career in architecture, so I was comfortable using computer-graphics software. When I first started shooting artistically, because I was so used to Photoshop, I was really relaxed with lighting, hair, and makeup, thinking, “Oh, I’ll fix it in post.” Then I learned more about what I could and couldn’t do in Photoshop, and I began to demand more control from myself when it came to planning and working through issues during the shoot.
For example, if there are any distractions in the background, I’ll clean them up during the pre-shoot because that’s one less thing to do in Photoshop. And if the hair doesn’t look quite right, I’ll make sure it’s corrected on set instead of taking it into Photoshop. Knowing my limitations in post-production has helped me tighten my creative eye when I’m shooting.
I look to be moved by my own images, and that’s why they’re all so special to me. Because I cannot control what other people think of them, but I can control what I think of them.

Tip #8: Be vocal.
This relates to trying to do less in post. In order to evoke the right mood, I have to communicate with the model. I try to be really direct — I think it’s just part of my personality. And if I’m looking for something in particular, I will say it as clearly as possible: “Can you look that way? Can you gaze this way? What about if you close your eyes and tilt your head back?” Whenever I’m on a shoot, I’m consciously looking at what the body’s doing, what the head is doing, the facial expressions, are the hands right. I’m looking at all the pieces and how they flow together. The model cannot see what I see, so my voice and my words are the only guide. We are working together to capture something.

Tip #9: The right mind-set matters after the shoot, too.
When it comes to editing on the go, I struggle. Usually when I’m traveling, I’m very present at that moment in time. And I find that when I’m editing, I need to be at a desk, sitting properly, with my things around me: a cup of tea, a candle, some music. The stage needs to be set for the magic to happen. It’s important.
Post-processing takes me around an hour—hour and a half—per image. Lately I’ve been placing pressure on myself to have it take less time. One of the things that really has helped me is creating actions of my color-toning processes. A lot of the time I spend looking at the computer wondering which color direction the image should go because there’s 500 options, and color is just as important as everything else in that image. If you come into it with cool blues and greens, it’ll give you a totally different atmosphere than if you color-graded with warm yellows and soft oranges. By using my actions I can cut down the time I spend editing by 70%.

That also helps when I’m traveling. I have a main hard drive I work from, a second hard drive as my backup, and then all my final images go onto SmugMug so there’s a safe place online all the finished images live. That also helps whenever I’m on the go doing interviews, or if I need to send a client an image, because I don’t need to grab my hard drive for images. I just go to my SmugMug account, locate my image, and send a link to it.
Tip #10: Never be afraid to play.
Move around, shoot from the side, shoot with things in front of you. Get some props and make little challenges for yourself. Shoot through things like a jar, a prism, or a bush. I find that when I’m working with a client, they will often have a strict idea of what they’re looking for. But usually the best images are created when they give me 15 minutes to play and I change it up: change the poses, change the location, change the angle I’m shooting at. I had a shoot recently where I set up people on these steps and it was great, but it wasn’t until I moved behind a bush and shot through a gap in the bush that we got the shot. That was really fun. Be playful when you’re shooting because you never know what you’re going to capture. Sometimes the camera sees very differently to the human eye.
___
Find Bella online:
Portfolio
Flickr
Facebook
Twitter
Instagram
___
Subscribe to the SmugMug Films channel to see future installments as soon as we set them free.
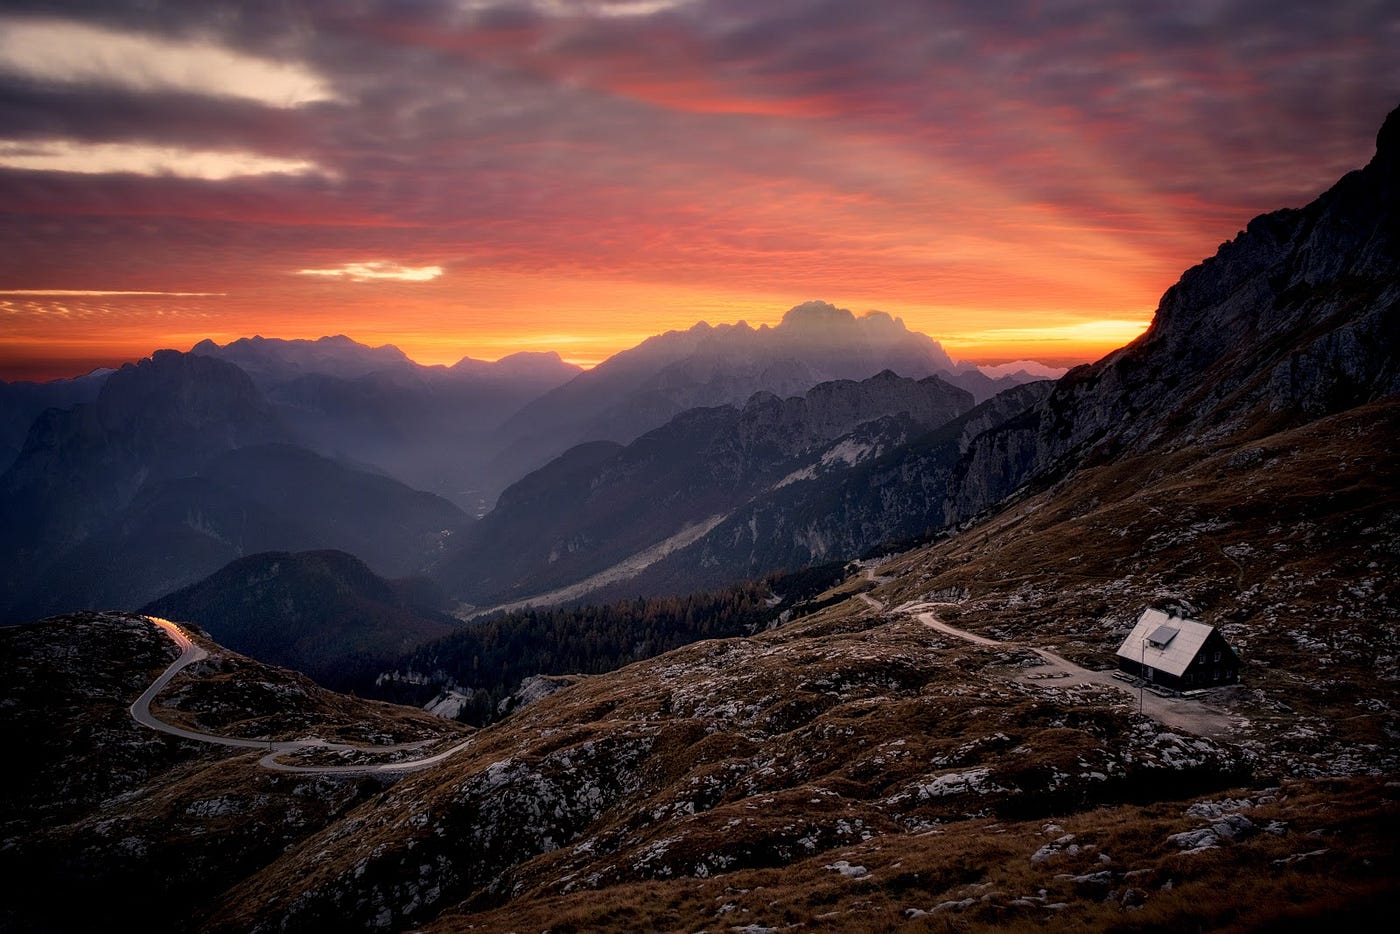
SmugMug Films Interview: The philosophy of light with Karen Hutton.
SmugMug Films Interview: The philosophy of light with Karen Hutton.
Photography has been a way of life for Karen Hutton since she was young. When a previous generation of her family emigrated from Norway, they photographed everything they could of the journey. That legacy of photos passed to Karen’s mother, and the shutterbug gene continued on to Karen, who grew up with camera in hand. It’s not only been a part of her life, it’s become part of her philosophy: a philosophy of light.
Learn more about Karen’s philosophy in our latest SmugMug Film, and read on for her best photography tips.
Tip #1: Express yourself.
Many photographers have a niche or genre they love and hone into their art. Although I’m known for landscape and travel photography, I explore nature, writing, and more. Photography is about more than a particular genre. In my mind, it’s a philosophy of life and light and awe and wonder. Photography is a means of expression and of conveying beauty and wonder in the world. You can stand behind the camera and create a signature image no matter what you’re shooting. The important thing is to express yourself and what matters to you.
Tip #2: Stay true to that expression.
The biggest challenge in photography is the same challenge any of us face in the performing arts, which is to be in the zone — to bring your true self every time. We have a billion distractions every day, and the hardest thing is to stay present every time you apply yourself to your art. People say, “It’s hard to stay fresh. It’s hard to stay inspired.” But the present moment is where inspiration lies.

The challenge is to decide who you are in your art because this will define who you are in your business. It will help you find your audience. It’s not the same as it used to be. You can’t just run around and sell prints. You have to dig quite a bit deeper and have a few tough moments with yourself to figure out who you’re going to be within your photography and what you really have to offer. Then stay true to what that is.
Tip #3: Learn what you love to see, then go capture it.
I have this way of finding places I want to photograph that people tend to blow off when they first hear it because it sounds so general, but it isn’t. It’s smart, and it’s specific: I know what I want to see, what I need to see, and what I love to see. When those things come together, magic happens.
When I consider going somewhere specifically for photography, whether it’s a new or an old place, I think about what I want to see. I’ve lived near Lake Tahoe for thirty years. I’ve shot it so much, I know that I want and need and love to see when it’s dramatic — when the colors are a certain way; when the air has a certain electric spark in it. I’m going to look for those conditions before I take the trouble to trek out there and set up my tripod.

If I think about somewhere new I want to go, I know I love to experience history. And I love to experience nature because it’s the brushstroke of creation. So I look first for those things. Then I look for the light and air to be a certain way. I look for the things I want, need, and love to see and that sets me on fire.
Tip #4: Live in (and photograph) the moments.
In landscape, the moments I look for I usually find in morning or evening light — which is kind of obvious. I don’t mind when the sun is high, but I like the sun high in winter way more than in summer. Here in the mountains, bright sunlight in the summertime washes everything out. Whereas in wintertime, even the highest sun is still beautiful.
When I go out, I look for the moments that make my stomach flutter, make me gasp, make me cry. I’ll have some physical reaction if I’m being present; I’m not sitting somewhere thinking, “Rule of thirds says this is a fine photo.” I don’t do that. I go by my gut. When I feel something is when I take the picture.

That’s what I always challenge myself with: telling the story of my experience, of the beauty, of how I feel. It’s my take on each of these scenes, but I do it through wide, mid, and close-up photos. I try to do all focal ranges everywhere I go, if I have time, so that I walk away with an entire book of moments.
Tip #5: Gear is what supports your vision.
You need to have the technical know-how, but you also need to have the inspirational artistic vision. FUJIFILM gear bridges that gap for me better than any other gear on the market, and it has everything to do with the way I like to interact with my gear. I also have a cinematic way of seeing, and their colors come closest to what I see and feel than any other camera.
The other reason I love their cameras is because I’m muscle-memory oriented. Muscle memory for settings works way better for me than menu diving because I’m always trying to be in the moment. With FUJIFILM, there are six or eight external buttons I can customize. Once I see and feel the moment I want to capture, I can just do it without thinking, which is so important for my approach to photography.

This philosophy guides all my other gear choices, too. I need them to work without pulling me out of the moment. Really Right Stuff is the last tripod I’ll ever have to buy because of how smoothly everything works, no matter how cold it is. Super secure. Super solid. Never fails.
My LucrOit filters are super true. They don’t tint anything. Their holders make it super easy to snap filters on and switch them out. I hate fussing with gear because it’s a distraction. These filters help me bring my vision to a photo without disturbing the moment.
SmugMug helps me share that vision with the world — without ever getting in the way. I’ve always felt like it was my “ace in the hole” when it comes to showing my images online. When I send someone there — or show them my work on the app — I’m relaxed knowing my photos look amazing with no worry about the user experience (it’s always great). It helps me present my art and do business seamlessly.
And that’s the key for any gear: it should support your vision and help bring it to life. It should never interfere with your moments.

Tip #6: Post-process to refine, not fix.
Get the image right in camera first, as much as possible. Then use post-processing to take it in the direction you originally envisioned. I prefer to use Photoshop over Lightroom to refine my vision, which usually shocks people. But I don’t shoot for volume. Shoot with meaning. Know what you want. Don’t shoot a million photos simply because you have room on your memory card. When you have a vision behind what you’re doing, you don’t come home with so much extraneous stuff that you need an enormous database to manage it.
I also prefer to work in layers. The simplest photos will always have at least three or four layers. The more complex ones might have thirty. This is why I use Photoshop, along with some plug-ins like Aurora, Luminar, Google Nix, Alien Skin, and Exposure.

To make an image better match my vision, the first thing I do is balance and clean up a photo. This usually involves tweaking highlights and shadows and cloning out any dirt that may have been on the sensor. The goal is to get the image to a good baseline. Then I may decide to add some adjustment layers and work on the light; I let the life of the image start to come through and get more creative from there.
Tip #7: Learn. Forget. Create. Repeat.
If you want to get started in photography, learn from others — even imitate them to learn how something feels or works. Then, forget all that and go back to what you want, love, and need to see, because that’s where life and art intersect. If it doesn’t make you gasp, don’t take the picture.
Beauty awakens the soul to speak. If there were ever a time that we need the soul to wake up and speak, it’s now. We need beauty now more than ever.

___
Find Karen online:
Portfolio
Facebook
Twitter
Instagram
___
Subscribe to the SmugMug Films channel to see future installments as soon as we set them free.


