This tip is brought to you by cabbey, landscape and fine-art photographer, and one of SmugMug's backend engineers. He's usually up to his elbows in the code that sends your orders to the labs and your profits to the bank, but now he's sharing some tips for photographers who want to be sure they’re getting the best possible prints.
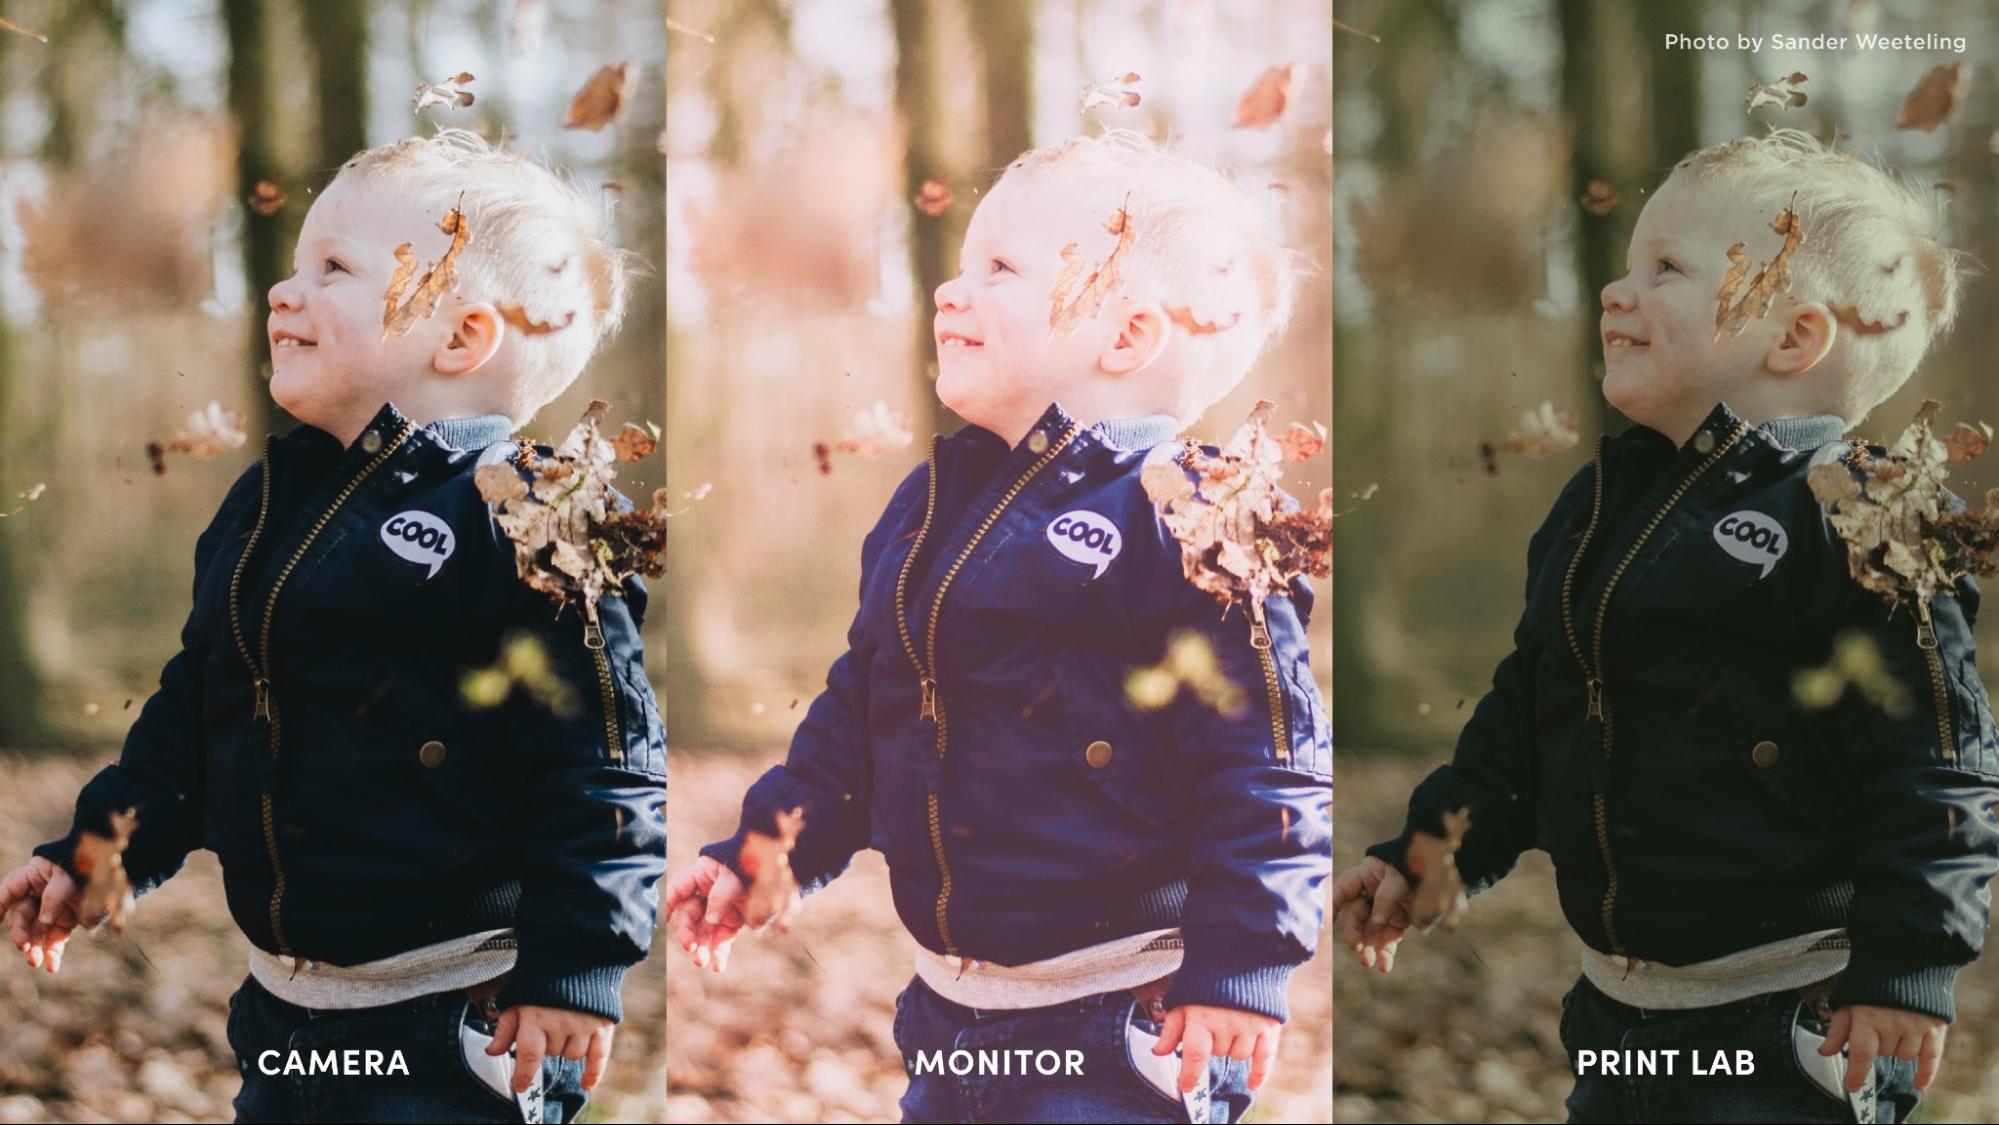
Let's say you take a picture of your son and the camera does everything perfectly in terms of white balance and exposure. You made sure the image was properly exposed, something akin to the image on the left below.
Next, you downloaded that image and loaded it onto your computer. But your computer's monitor isn’t calibrated, so your photo suddenly looks too red and too bright, like the middle image below.
To correct this, you fixed it in Photoshop until it looked like the original image. When you were done, you uploaded it to SmugMug and ordered a print, then received something that looks dark and weirdly tinted green:
They didn't! The problem is that monitors are generally made for office tasks, not photography. Manufacturers give you the brightest display possible with the punchiest red they can produce.
As a result, any time you process your photos on an uncalibrated display, you're making your image considerably darker and turning down the red cast, skewing everything toward cyan. The third image above is what your finished photo actually looks like, and the lab faithfully printed what you sent them.
By calibrating your monitor, you'll get better prints and happier customers without having to fall back on SmugMug's 100% print guarantee. The top three correctable problems that land on our help desk are
We have a great help page about return rates that shows what gets returned and why. The top six reasons are all solvable by using a properly color-managed workflow.
Exactly how you do it depends on what gear you buy. There are a number of different choices, but the leaders of the pack are Datacolor's Spyder and X-Rite's lines.
In general, you'll need a colorimeter or spectrophotometer (fancy words, but they basically mean a special device you can put on your screen and plug in to a USB port) and a piece of software that usually comes bundled with it. The software will put your monitor through its paces while you have the meter on it, then it uses that information to build an output profile for your screen.
With that resulting profile, any software that cares about a properly color-managed workflow can properly display accurate colors on your screen. Since monitors' color accuracy varies over the lifetime of the display, it's important to update the profile periodically, at least every month or two. Most of the above programs will remind you when it's time to re-profile your display.
You can also get a calibration print with SmugMug. With that in hand, you can bring the calibration image up in your editor of choice and see how much closer a calibrated workflow makes it look on your monitor. The closer it is, the closer your images will be when you're editing them.
Portfolio and Pro account holders can always print through Bay Photo, WHCC, or Loxley Colour, whose color-correction services are always done by hand. It costs a little more, but it can save you time at your desk, or headaches if you don't feel like fiddling with your computer.
You can find this option when editing your pricelists.
Most operating systems have an "eyeball" calibration you can do that will at least get you started. They aren't as accurate, and they depend on your eyes making decisions, so be aware that this may not work for everyone.
On a Mac, use Spotlight to launch Display Calibrator Assistant. Once it opens, just follow the steps.
On Windows, search in the control panel for "display calibration" and, again, follow the steps.